11.11.24

Happy 249th Birthday Marines Nov 10 and Happy Vet's Day Nov 11

 Happy 249th Birthday Marines! 


Here's to many more birthdays for both.


Semper Fi

-ab

This blog is considered to be a living blog. Changes will be made to it as needed to clarify, correct errors or update with new information.  Also, this is my opinion, right or wrong. And I apologize, but this review may contain references to graphics that are no longer on this blog.

9.11.24

the other day...

I was sitting and thinking about my past life - the wars I was in, the games I played, Officers and Gunnys I would follow into hell, the two branches of the US Military I proudly served (and retired from), the College I spent my last 20 years working (and retired from), countries I have been in, and most importantly, friends thru out the years who are no longer here.  

This poem by A.E. Housman was quoted while watching "A Touch of Frost", Season 4, Episode 2, one of my favorite British TV mystery shows. DI Jack Frost was eating and thinking about the past, when one of the pub owners quoted this poem.  I liked it, had to look it up, and after reading, thinking for a few days about what was written and realize how correct A.E. Housman was, so, I figured I would share.  Here it is.   Enjoy....


A Shropshire Lad, XL
Into my heart an air that kills  
   From yon far country blows:  
What are those blue remembered hills, 
  What spires, what farms are those?  
 
That is the land of lost content,
  I see it shining plain,  
The happy highways where I went  
  And cannot come again.

-ab


This blog is considered to be a living blog. Changes will be made to it as needed to clarify, correct errors or update with new information.  Also, this is my opinion, right or wrong. And I apologize, but this review may contain references to graphics that are no longer on this blog.

23.5.24

The old ones

Hi,

There are times when the world of history becomes a bit too much and I sit there contemplating something not real  such as sci-fi games or good old pnp rpgs.

No game review, nor silly things like new games coming out, instead a listing of different web sites that help keep the "old" games and magazines alive.  

1) Everyone has heard of Avalon Hill games (correctly called TAHGC from a law suit).  But not everyone has seen "The General", TAHGC house magazine.  Here is a link to every one of the Generals published, click here to read.

One can also download TAHGC house magazines on their sport games and a short lived Role Playing Game (RPG) mag, "Heroes".
 

2) Of course sometimes one needs to find that "something" for a TAHGC game, maybe a new game board, a counter or who knows???.  If so, look here, as one may find it,  click here.

3) From Metagaming came "The Space Gamer".  This was Metagames house magazine. Howard Thompson was the owner and over the years, he has disappeared.  No one knows if he finally "lost it", hiding from creditors, or died.  But I do know he let several great games slipped thru his fingers and just got plain weird towards the end.  Again, these are available  in .pdf format. Click here to read.
 
The Fantasy Trip (aka TFT) was one of my favorite RPGs. Still have them including all the solo adventures.  Worn out, played to death and hopefully getting ready to introduce this series to the neighbor kids.  Steve Jackson was able to get the rights to this series. And he brought them back out. 


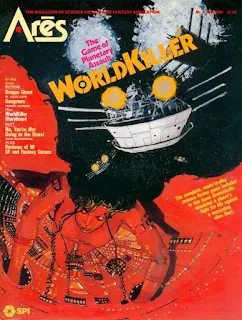
4) One of my favorite S&T spin offs in the Sci-Fi world was "Ares" magazine.  Each issue (except two special issues) had a small capsule type game.  Some were fun to play, some sucked.  Again, available for download including the games in .pdf format.  Click here to read. 

5) Speaking of SPI or S&T games, here is a link to SPI Wargame Resources.  A very good site that has all sorts of items related to these old games.  Click Here.

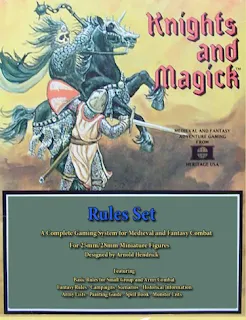
6) There is one additional RPG game book that I bought and played in the 80's. This is "Knights and Magick". I lost my copy when we had some of our house hold goods stolen coming from the UK.  Nothing like thieves stealing from folks and one can this find rule book here

Brought back out by Jeff McAleer of "The Gaming Gang", a crazy large RPG site.  Available once again in several versions from a .pdf to hard bound book.  197 pages of good role playing. Heritage Games brought it out originally to go with their 25mm lead miniatures. The rules are available here - It is available here (same as above).

Speaking of Heritage, I met Duke Seigfried at a model convention in Phoenix Az, back in 1981 when I was stationed at Luke AFB.   I took best in show with a 25mm diorama, best in 25mm, and best in 54mm with my miniatures. He was giving out the trophies and we just started talking after the show as I guess I must have impressed him for the two 25mm minis were Heritage USA. The 54mm was a horse and knight from Michael Stackpole (yes, that Mike Stackpole) that I was commission for mounting and painting.

Anyway, Duke invited me to his room and showed me how to paint using his new method for putting out a large group in the quickest time. I believe this was called "stain" painting.   I still have a bunch of Heritage 25 mini's of knights, monsters, etc.  Somewhere I have the original brochure that Heritage put out. I need to find it and put it up.  Note - in this reprint is Duke's own stain painting manual.  😉

Most people who offer .pdfs on a web site, say one needs to download Adobe pdf reader, a very bloat-ware piece of crap. Bull shite. I use  Sumatra PDF reader.  Free, lightweight and no bloat-ware. Click here to download.

7) And Heritage also came out with their "Dwarfstar Games" back in 1980 to 1982. Reaper Miniatures gave their blessing to allow 7 of the 8 games to be downloaded. Click here to download.  
 
The one game missing is Dragon Rage. Flatlined Games does not own it anymore with the copyright going back to the original designer, since 2010.  
 
 We will probably never see it again.
 
 
Status
Author(s) Lewis Pulsipher

Of course Reaper Miniatures still owns the copyrights of 7 of the games and one cannot print and publish these games for selling.   But it sure is nice that they are available.  Thank you Dennis Sustare of Reaper Miniatures.

8) Wargame Academy (WGA) is also online for various games from different publishers. Click here to go there.

I am sure there are other web sites that have game parts and other items for us folks who enjoy the older games, I just need to close this posting now.  If you know of some of these, let me know in the comments section below.  

And honestly, thank you for stopping by! I would like to hear any comments you may have on any game, or this post, either good or bad.
-ab

Updated to correct an error. 

This blog is considered to be a living blog. Changes will be made to it as needed to clarify, correct errors or update with new information.

19.4.24

Sound and Fury, The Battle of Mechili Jan 24/25 1941

Up for a review is an oldie but goodie game from 2016.  Small, easy to play and fun, read on if you like...

Title: Sound and Fury, The Battle for Mechili, January 24/25, 1941
Price: $*
Designer:  Paul Rohrbaugh
Graphics Designer:  Ilya Kudriashov
Publisher: High Flying Dice Games
Published Date: 2016
Subject: The battle around the cross-roads of Ft Mechili 1941.

A Little bit of history: Italy declared war on Britain and France on 10 June 1940. During the next few months there were raids and skirmishes between Italian 10th Army in Libya and the British Commonwealth forces in Egypt. The Italians planned for the invasion of Egypt with the goal of removing the British and to capture the Suez Canal, code name "Operazione E". After numerous delays, "Operazione E" commenced on 13 September 1940 and began the Western Desert Campaign, which lasted from 1940 to 1943.

The Italian strategy was to advance from Libya along the Egyptian coast to seize the Suez Canal, the scope of the offensive was reduced to an advance as far as Sidi Barrani and the engagement of any British forces in the area.

As the 10th Army advanced, a small British force at Sollum withdrew to the main defensive position east of Mersa Matruh. The Italian advance was harassed by the 3rd Coldstream Guards with attached artillery and other units. After recapturing Fort Capuzzo, the Italians advanced approximately 95 km (59 mi) in three days and on 16 September, the advance stopped at Maktila, 16 km (10 mi) beyond Sidi Barrani.

The 10th Army dug in and awaited reinforcements and supplies along the Via della Vittoria, an extension of the Litoranea Balbo (Via Balbia) being built from the frontier. Five fortified camps were built around Sidi Barrani from Maktila, 24 km (15 mi) east along the coast, south to Tummar East, Tummar West and Nibeiwa; another camp was built at Sofafi on the escarpment to the south-west

General Wavell, following the 10th Army advance,  ordered the commander of British Troops Egypt, Lieutenant-General Sir Henry Maitland Wilson to plan a limited operation to push the Italians out of Egypt back into Libya, was given the code name "Operation Compass" and was originally planned as a five-day raid, but consideration was given to continuing the operation to exploit any success.

Attacking on December 8, 1940, the British Commonwealth forces units struck at Sidi Barrani exploiting a gap in the 10th Army's defenses, attacked south of Sidi Barrani and achieved complete surprise. Supported by artillery, aircraft, and armor, the assault overran the Italian position within five hours and resulted in the destruction of the Maletti Group and the death of its commander, General Pietro Maletti.

Over the next three days, the British pushed west destroying equipment and capturing 38,300 men. Moving through Halfaya Pass, they crossed the border and captured Fort Capuzzo.

Wishing to exploit the situation, O'Connor wanted to keep attacking, however he was forced to halt as his superior, General Archibald Wavell, withdrew the 4th Indian Division from the battle for operations in East Africa. This unit was replaced on December 18 by the raw Australian 6th Division,  the first time Australian troops saw combat in World War II.  Resuming the advance, the British were able to keep the Italians off balance with the speed of their attacks which led to entire units being cut off and forced to surrender.

Continuing the attack, the British wanted to finish what they started - destroying the remainder of the Italian 10 Army, which was retreating from Cyrenaica. 

Pushing into Libya, the Australians captured Bardia (January 5, 1941), Tobruk (January 22). After the fall of Bardia and Tobruk in 1941, the British forces was split with the 6th Australian Infantry Division heading towards Derna, along the coast road and was temporarily halted by the 60th Infantry Division "Sabratha" reinforced by the Libyan paratrooper battalion "Ascari del Cielo" and reserve units.

Meanwhile the 7th Armoured Division going south approached Mechili, a crossroads of strategic importance. On 24 January, a squadron of light tanks from the 7th Hussars headed to the west to cut the track linking Derna and Mechili (north of Mechili) and ran into the new M13/40 Italian tanks of the Ragguppamento 'Babini'.

Ragguppamento 'Babini' attacked the 7th Hussars (composed of 26 Mk VI light tanks and one cruiser tank), destroying six Mk VI light tanks and forcing the others to retreat. The British was able to knock out 2 M13/40s.

The 7th Hussars promptly pulled back, calling for the assistance of the 2nd Royal Tank Regiment which ignored the call for assistance, until eventually someone got their butt kick and the 2nd Royal Tank Regiment got under way catching the Italian tanks that were sky-lined on a ridge, knocking out seven of them for the loss of one cruiser and six Mk VIs.

The principle armour of each antagonist during this battle: For the Italians this was the CV35 tankette (these are the Fiat Ansaldo 35 in the game. Developed from the Carden-Lloyd Mk VI tankette Italy bought in 1929), possibly the M11/39 (though most were probably destroyed in previous battles at the start of Operation Compass) and of course this was the debut of the M13/40. 

The British used the Carden-Lloyd Mk VI's tankette and various Marks of Cruiser tanks (I, II, IIA).  Being lightly armoured, the tankettes were death traps to both sides as they were brutally destroyed. 

Abbreviations that may be used: AF= attack factor, DF= Defense factor, MF= movement factor, VP= victory point, 1D6=one die six sided, CD= card draw, Mk= mark, AT= anti-tank gun, GD= graphics designer, INF= infantry, AC= armoured car, ACTS= activation (what a player can do), ML= morale level, BP= British Player, IP= Italian Player.

Components and Physical Quality: Though the game is a few years old, the graphics are what I would consider "very good gaming graphics" and brought to us courtesy of Ilya Kudriashov, who (IMHO) is one of the top game graphic designers around and in my top 5 of the best GDs out there (that knowledge and $45 should be able to buy you a cup of tea or coffee, but not a beer, anywhere in the world).

There are 56 unmounted double sided counters, .5" in size, and use a combination of NATO symbols and side views of the various armour used.  Each counter is composed of the AF-DF-MF with Armour and AT guns having a "red" AF.  Not all armour has a "red" AF.

The game map is 11"x17" in size, but honestly, the playing area is only 8"x10" with .5" letter/numbered hexes. Shaded in 2 colours, to represent the terrain levels (level 1 and level 2) with Mechilli in the middle. The sand is shaded with various dots.  I would hate to be the GD as I would be blinded by having to place all those dots. 😊

The rest of the game map has the various turn tracks,  the Morale & Support track, and a VP track.  There is also a terrain chart listing the movement costs and a unit breakdown  chart. 

Amount of counters and breakdown: For the British, there are 8 British armour, 3 inf, 1 AT, 1 VP marker, 1 arty support marker, 1 air strike support marker, 1 air strike target marker, 1 arty target marker,  and 1 morale marker for a total of 18 counters.  

For the Italians: 4 armour, 1 AC, 6 inf, 2 AT,  1 morale marker, 1 VP marker, 1 arty support marker, 1 arty target marker, 1 air strike support marker, and 1 air strike target marker , for a total of 19 counters.  In addition, there are 17 "pinned" and "entrenched" (flip side) markers, 1 game turn marker, and 1 "Fog of War" marker, all total 56 counters.  

Addenda: Why yes, yes therre is. 😏

There is one extra addenda not mentioned - The British has two x1 VP markers. The British VP marker needs an x10 on it's flip side. Just add a "0" and it is fixed.  

Of course, here some 8 years later, the addenda has been incorporated into the rules, but just in case you bought yours back in 2016-17, here it is for you. 

Player Supplied Components: Players will need to provide a 1D6 and a deck of cards.  If you are a fan (or not) of HFDG card sets, good news as this game has a set available.  For $11.00 one can have a fantastic card set designed by Ilya.  Just contact HFDG when you order the game.  Better yet, order 4 games from HFDGs and get this card set for free. 😉

And of course, one will have to mount the counters, unless you opt to have this done for you. Not sure of the cost, but it is available. You will still have to cut them out.  Mounting and cutting counters is easy to do and if you need help, there is a short review on this blog that explains how to do this, safelyGo here

Complexity: The game is considered introductory and yes, it is.  But like most games from HFDG there are variant rules to increase the difficulty.  I would suggest that after a few plays to get the game down, add all of the variant rules.  Just remember to read the rules. Don't add to them or over think the rules as most gamers do. Just go by what the rules say. (see 12.0, 12.1, 12.2, and 12.3)

Playing Time: Between 60 minutes to 120 minutes.  Of course play could last longer or shorter, just depends on how fast folks get thru the deck of cards.

Rules: Ah yes, the rules.  Only 6 pages of rules, written in the standard high quality one comes to expect from High Flying Dice Games. 

Setup: A standard deck of cards with 2 jokers and with all face cards removed or just use the card set for this game.  Divide the deck into black and red cards with 1 joker for each player. Italians (black deck) set up first then the Brits (red deck). With only  12 units on the British side and 13 for the Italians, setup is a breeze, maybe 2 minutes?(see 2.0, 2.1, 2.2, 2.3)

Game Play: 8 turns of game play with each turn divided into rounds.

In this game play, the highest card drawn wins the round and the winner gets to preform a number of acts. If the winning player's card is odd, then that player gets 3 acts. If an even card, then 2 acts.  If the CD is a tie, then the player who did not perform any acts in the last previous round can perform 2 acts.  If a joker is drawn, the player rolls on the random events table (last page of the rules).  

When the 2nd joker is turned over, the game turn is over with no one getting any acts. Move the game turn marker to the next turn, reshuffle the decks and then resume the game, unless it is the last turn of the game. (see 3.0 and Random Events when the 1st joker is turned over).

As with all good things, in case the 2nd joker is drawn before all players have activated at least once, discard the joker and continue play until all cards have been used. 

The game can be won by several methods. If, before the game has ended on the last turn, either player can claim an automatic victory by reducing their opponent's ML to 0 (zero) (See 9.0) or if not, on the last game turn the winner is declared by victory points. (see 11.0) 

Activations:  Each act allows either player to do one of the following with 1 unit (see 3.1):
1) arty support (see 5.0)
2) air support (see 6.0)
3) move (see 3.2 and 4.2)
4) assault (combat) (see 4.0, 4.1, and 4.2. If using variant rules 12.1, 12.2, 12.3)
5) entrench (only inf and at units only) (see 7.0 and 4.2)
6) rally (see 8.0 and 4.2)

Note - Basically, one can either do arty support, air support, entrench a unit or rally, moved a unit or assault with a unit. For example you cannot move a unit then attack with the same unit, even if you have more than 1 act available. One will have to wait till the next CD win to move or attack with that unit, again.

GT1 first Activation: The British has the first activation of Game Turn 1. BP rolls 1D6 to see how many activations are allowed.  After these acts are preformed, begin the normal CD. (see 2.2 and 3.0)

Movement: When moving units via the movement act, units must stop when entering a hex adjacent to an un-pinned enemy unit.  Units may not stack, but may retreat thru a hex occupied by a friendly unit, up to it's MF.  (see 3.2 and 4.1)
 
Pinned Effects: Units that are "pinned" cannot activate except to "rally". The pinned marker is removed at the end of each turn, not round. (see 4.2)

Special mention for "assault": Armour and AT units can attack enemy armour up to 2 hexes away and up to 3 hexes away if the armour or AT unit's AF is red and the attacking armour unit is on level 2 terrain and the defending unit is on a level 1 hex. 
 
To figure out the assault, roll 1D6 and modify the DR as follow (and use all that apply):
+? Attacking unit's AF
-1 Target unit in village hex or entrenched(-2 maximum)
+1 Firing unit is in level 2 and firing on unit in a level 1 hex.
+1 Red AF unit firing on "pinned" armour unit.
-1 Target unit is not adjacent
+1 firing through target unit's rear aspect (if playing with variant rule 12.1).
 
If the modified DR is < (less than or equal to) targeted unit's DF nothing happens.
 
If the modified DR is < (less than or equal to) 0 the attacking unit is also marked as "pinned".
 
If the modified DR is > (greater than) the target unit's DF, one of these can happen:
  1. If target unit was "Un-Pinned" it is marked as "Pinned". Place a pinned marker on it. (see 4.2)
  2. If the target unit was "Pinned", it must immediately retreat or take a step loss (reduced). Defending player's choice.  (see 4.1 and 4.2)
  3. A unit unable to retreat must take a step loss. A unit already reduced and must take a step loss or only has one step, is eliminated and removed from the game.  Don't forget to change the "Morale Level" track. (see 4.1, 9.0, and 11.0)

REMEMBER:  There is no stacking (more than 1 unit in a hex) and assault is 1 unit attacking 1 unit. And attacking a reduced "pinned" unit is a sure way of deleting the game counter from the game.

Artillery and Air Support Strikes: I forgot to say something about these rules.  The most important item to remember is that "reduced units" cannot be eliminated by an Air Support Strike or Artillery Support Strike. (see 5.0 and 6.0)

Morale Levels:  This is probably the 2nd most important part of the game. While "assault" is the soul of the game, "morale" is the heart of the game. The Italians morale was shattered when Operation Compass started with masses of Italian troops surrendering as the campaign went on.  However as stated before at this battle, the Italians were better lead and fought like wild cats. 

In this regard, Paul was able to capture this through the use of the changing "Morales Track".  And it's importance cannot be over stated. Pay attention to morale levels in the game.  As soon as it becomes"0" for either side, the game is over. (see 2.0, 9.0, and 11.0).

Fortunes of War (FOW counter):  This is the mulligan for the game.  The British controls the counter on turn 1 and can be used once per turn, during any round. After it's  use, the counter goes to the other player, to be used starting the next turn.  The FOW doesn't have to be used, but it represents the "lucky rabbits foot" (unlucky for the bunny though!). (see 10.0)

Summary:  Well, that's it.  Been sitting on this one for awhile as I have been busy.  But enough on that, this game is what I am talking about.  

Sound and Fury is a small, well-thought out game, without a lot counters. And that is good.  A card draw system is used, which if you follow this blog, you know that I prefer this to the i-go/u-go gaming standard for movement and combat. 

In this game, one has air support, arty support (Italy really loved and used artillery), movement, combat (assault), entrenching, and rallying. One also has morale playing a huge factor in the game as the Italians did surrender a lot during Operation Compass, except at this battle... they fought like wildcats.    

Unfortunately for the historian, most of the Italian 10th Army OOB was lost when the army was decimated. One can find the information, but it is difficult and very time consuming as unfortunately most English sources may have errors. But, thankfully these days, historians have preserver in hunting down this information along with people who are translating the Italian papers into English.  Sorry, but Italian history of units in WW2 is just as important as the US 101st.

Paul in his experience, both as a historian and game designer, has found several reliable sources and was able to design this game. I would recommend the three sources listed in the game rules. Also I have found the site "Comando Supremo - Italy in WW2" is probably one of the better places to start if you use the web and will have other sources, especially the Italian sources. 

I do have another 2 sources to add -

  1. Le Operazioni In Africa Settentrionale Vol 1 - Sidi El Barrani (Giugno 1940-Febbraio 1941) by Mario Montanari (Operation in North Africa Vol 1) (1st Edition in Italian, 2nd Edition in English)

  2. Fallen Eagles: The Italian 10th Army in the Opening Campaign in the Western Desert, June 1940 - December 1940 by Major Howard R. Christie, USA. Combat Studies Institute. 1999.

Operation in North Africa Vol 1 is directly from the Italian side.  Mr Montanari spent years interviewing actual Italian and British participates in the 10th Army recreating the lost 10th Army OOB.

Source #2 is also very good giving a good amount of history of the Italian Army going back to 1911 and again various sources were used by Major Christie as this was his Master's thesis.  Though Major Christie covers only up to December 1940, don't let that stop you from reading this. The history prior to Operation Compass and the "why's and there-fore's" of Italy's thinking can give you something to ponder on. 

You should be able to find these sources pretty easy.  

I do hope you enjoyed this review. I also hope you get Sound and Fury and enjoy that game too.  

Arrivederci miei lettori,

-ab

Here is a Player's Aid I was working on many years ago.  It is still usable if you would like to use it.  Prints out on 8.5 x 11.0 sheet of paper. 


This blog is considered to be a living blog. Changes will be made to it as needed to clarify, correct errors, or update with new information. Also, this is my opinion, right or wrong.  

Yes, I found my notes. I write everything down as I can't depend on my memory these days.  This review was updated today, 4/25/2024 to incorporate these notes.  Basically they are items I found challenging and had to write down. 😟

15.12.23

Breaking Teeth - The Battle of Teruel, Dec 15, 1937

Title: Breaking Teeth - The Battle of Teruel, Dec 15, 1937
Price: $*
Designer:  Paul Rohrbaugh
Graphics Designer:  Ilya Kudriashov
Publisher: High Flying Dice Games
Published Date: 2017

A little history: This is the debut game (first) in Paul's eight game series on The Spanish Civil War, from 1936 to 1939. The game came out in 2017 and showed by it's wide acceptance by gamers that it was time to bring out individual battles on this fascinating time period of human history.  And for this I am glad. This period of warfare foretold of what type of world war was coming in regards to tactics and weapons.  It was also a training war for the Soviet Union, Germany, and Italy with other countries watching.

The city of Teruel, Spain was fought over for about 3 months  starting on Dec 15, 1937 and ending later in February 1938, during one of the harshest winter storms to hit Spain in twenty years.  Lack of food and warm clothing contributed to the numerous causalities as much as guns and artillery. Originally held by the Nationalists, the city fell in December to the Republicans, who  were then counter-attacked by the Nationalists in Jan 1938 and finally re-captured in Feb 1937. Needless to say, it was very bloody and the casualties on both sides including civilians ran high.

👉 Note: $* this means I have no idea the cost these days. Sorry.

Scale: Each turn is equal to 3 days of time and the units represent regiments or brigades for infantry and battalions for Armor. I haven't figured out how big a hex is, yet, but I believe it is about 1 to 1.5 NM* each. (see 1.1)

Note - NM = Nautical Mile - aprx 6080 feet.

Player Supplied Components:  Players will need to supply one D6 and a deck of cards in lieu of using the card deck that is available for the game.

Abbreviations Used:  AF=Attack Factor, DF=Defense Factor, MF=Movement Factor, RP=Republican unit, NP=Nationalist unit, CD=Card Draw, ACT=Activation, 1D6=one die-6 sided, RE=Random event, VP=Victory Points, M=Morale Marker, FOW=Fog of War marker (or Fortunes of War marker), GT=Game Turn.

Components and Physical Quality: These are very good and the game arrived in a binder sleeve.

Now, I bought my copy in 2017, so this could have changed to a zip lock bag by now, though not sure (I'm too lazy to ask). 

One can always tell who the artist is by their graphics. In this case, this game is by one of the most prolific game artists working now, Ilya Kudriashov, with aprx 171 different games to his credit. In addition to being a game artist, he also draws maps and charts and has designed 3 games. Being a Muscovite, he now lives in Lithuania. One of the things I like about Ilya is he also a Napoleonic re-enactor. 

Counters: Sixty-three .5" in size, double sided counters that need to be mounted.  Easy to do. If you need to see how to do this please go here for my guide. Or  you can ask HFDG to mount these for you for a small fee, as making sure the front and back are lined up can be a little difficult. You will still need to cut them out.

The counter mix is of the following -
21 pinned/entrench markers,
1 FOW marker,
1 GT marker, 

1 RP Morale marker
1 RP VP marker (x1, x10)
4 RP Armor units
10 RP Inf units
1 RP Arty Support marker & 1 Arty Strike marker
1 RP Air Support marker & 1 Air Strike marker

1 NP Morale marker
1 NP VP marker (x1, x10)
2 NP Armor units (only 1 step)
12 NP Inf units
1 NP Arty Support marker & 1 Arty Strike marker
1 NP Air Support marker & 1 Air Strike marker
63 total counters

These counters are color coded for the Division or Brigade they belong to.  Nationalist are olive drab, while the Republicans are light yellow. A side view of the correct armor and aircraft with standard NATO unit markings for all other units and the AF, DF, and MF. 

What is very nice are the two air strike support counters as they represent the actual aircraft both sides used - the Po I-15 for the Republicans and the He 51 A-1 for the Nationalist.

Though small in size, the graphics used are actually very well detailed.  I had to use a magnifying glass the other day to look at something and noticed the detail in the planes, then the armor on a couple of counters next to what I was trying to see.  Next time I need to mount counters in games that Ilya has put his magical touch, I am going to blow them up a little bit more just to look at them.  

Game Map: 11"x17" in size and includes the following tracks on it - Morale, Game Turn, and Victory Points.  There is also a Terrain Effects key (showing effects for combat and movement) and a counter breakdown.

The actual game map has 2 levels of terrain, woods, roads, and the Rio Guadalaviar (aka Rio Turio south of Teruel) river. A hex grid is super imposed over the game map to regulate movement and distance.  Again, the game map reminds me, using graphics and the pastel wash of the colors used, of the time period the battle takes place.  Of course it could be the meds talking here, but I still like the artistic ideas at work.

Rules and Play: Seven pages of rules, explaining how to set up the game, the game play, the variant rules, nuances of the various rules, and designer notes with a reading list on the Spanish Civil War. 

The heart of the game system is the card draw for both sides. As I said before, but going to repeat here, I like this system. 😀

Using a standard card deck, remove all the Face cards (remember the "Ace" is not a face card, but "1" or "odd"). Divide the deck in two and give the black cards (and 1 joker) to the NP and give the red cards (and 1 joker) to the RP. Shuffle the decks.  (see 2.0, 3.0)

Note: This is just like "A Scourge of Stone and Spirit: The Siege of Harfleur, 1415" that was reviewed here.

Is there a Card Deck? Of course HFDG has a card deck available for the game 😉,  contact HFDG about getting this. Do you need them? Well they do make setup a little easier and they do look great (Ilya design them)!  But as always, it is up to you if you want these or not.

The game has 7 turns with each turn being many rounds. Each player turns over the top card and the highest CD wins the round. The same card, unlike some of the games that use the CD system, is also used to determine the number of ACTs available.  Odd CD gives the player 3 ACTs and an Even CD gives the player 2 ACTS.  And if both players tie in the card draw, the player who did not perform any actions in the previous round can perform 1 ACT.  (see 3.0)

👉 Note: Since the Republicans attacked first in the battle, they get the first round. After both sides have setup, the RP rolls a 1D6. 1-2 = 2 ACTs, 3-4 = 3 ACTs, 5-6 = 4 ACTs. After this one time roll, the game plays normally with a CD. (see 2.1, 2.2)

Ok, How do I play the game?: The player who wins the round can perform one of the following actions, per ACT, per CD, per round. (see 3.1)
a) Artillery Support Strike (see 5.0, 4.2)
b) Air Support Strike (see 6.0, 4.2)
c) Move (see 3.2)
d) Assault (see 4.0, 4.1, 4.2)
e) Rally (see 7.0)
f) Entrench (see 3.3)

👉 Note: These different actions a unit can do per ACT, can be performed in any order, just incase you wanted to know.  😉

When the first Joker is turned over (doesn't matter who) that player loses their turn and rolls 1D6 on the Random Events Table (page 7) and the event is in effect for the remainder of the turn (notice this is for the whole turn until the next Joker is drawn). Some events can happen only once per game or can happen once per turn.  Each event can happen for either player.  When the 2nd Joker is turned over, play stops, and if not the last turn, move the GT up a space.  Shuffle the decks and begin the next turn.   

Other Important Game Info: I see I forgot to chat on several things, maybe important, maybe not. Well, here it goes.

1) Stacking - Infantry Units cannot stack, but one armor unit can stack with one friendly infantry unit. That's it. Also, an Armor unit cannot be attacked separately if stacked with an Infantry unit unless that Inf unit is pinned or retreats from that hex. (see 3.2, 4.0, 4.1)

2) Pinned Units (see 4.2) - This can happen several ways during the round.
    Either by
    a) Assault (see 4.0)
    b) Artillery Support (see 5.0)
    c) Air Support (see 6.0)
   d) Units that are "pinned" are consider "disrupted". These units can attempt to remove the pinned effect by an ACT. Also, a "pinned" marker is removed at the end of the current turn (not round, unless rallied) (see 7.0)

3) Retreating (see 4.1) - This is important. Please be sure to read and understand this rule. 

Morale and Winning:  Morale is always figured immediately for either side when certain conditions happen. And if one side has "0" Morale after this figuring has been figured (lol, sorry, ran out of words to use), the game is over. (see 8.0) 

If the game goes to the end of turn 7 and morale is any other number from 1-5 for either, then victory points need to be counted and a winner declared.  (see 10.0)

Complexity: A little bit more than Introductory with four additional variant rules plus a new one from HFDG and see below in red.  As always, play with the variant rules. They don't really add much to the complexity, but ramp up the fun, IMHO. (see 11.0)

Setup Time:  With  the low number  of counters in play on Turn 1, setup is very fast. About 5 minutes if that long. 

Playing Time:  My games have played from 45 minutes to a couple of hours.

Solitaire Playability: Since I play mostly solo these days, I found the game (as with any game) easy to solo.  If there are two ways of doing something, such as move a unit or attack, I settle it with a 1D6 roll.

For example, if there are two attacks where the air unit can come into play, I would roll on a 3- (or less) for one battle and 4+ for the other to see which attack the plane will be use in.

Addenda: I found just two small ones.
1) Under 6.0 Air Support, paragraph 3, third bullet - "a unit cannot be eliminated via an artillery strike".  Need to add "Air Strike" and cross out"artillery" as it is covered under 5.0 Artillery Support.

2) The "Fortunes of War" counter is marked as "Fog of War". (see 9.0)

There is an interesting variant rule Paul came up for all seven SPW games, that I found. Here it is:

Spanish Civil War Variant: The following momentum variant rule can be used with all of the Spanish Civil War Games published by High Flying Dice Games (Black Shirts-Red Blood, Breaking Teeth, Courageous Tragedy, Viva la Muerte!, Sad Days of Battle, No Pasaran, and Tercio De La Muerte).

Variant Momentum Rule:
At start of each turn, beginning with turn 2 the player who played the last ACT of the previous turn has the Momentum for the current turn.

A player with Momentum can perform a number of ACTs equal to half of the player’s ML (round up any fraction) before players perform the first CD for the current turn.

After these initial ACTs whenever a player gets a number or CDs in a row equal to half of their ML a die roll is then made by the player. If the DR is greater than the player’s ML the winning CD is ignored and the opposing player’s losing CD is used instead. If the DR is less than or equal to the player’s ML the winning CD is not ignored and play continues normally. Perform this Momentum DR check every time a player gets consecutive winning CDs.

Note: A die roll of 6 always loses the momentum DR check!

For example: The Republican player has the momentum at the start of turn 3 and has a ML of 3. That player can perform 2 ACTs before any CDs are made. The second winning CD is red so a Momentum DR check is made (this would be 2 CDs which equal to half of the Republican ML rounded up). The DR is 4, so the Republican player’s winning CD is ignored. The Nationalist player is considered the winner instead and will activate with that player’s CD.

In case of tie CDs follow the rules as written. Also, Joker CDs trigger a Random Event check or the Turn End and are still implemented immediately with no activations per the rules. Remember, Momentum for the next turn is conferred to the player who wins the last CD of the current turn.

This variant rule is not in effect during any activations performed after the second Joker is drawn.

Now, please don't ask me how this new rule plays as I honestly don't understand it, as my head has been acting up. But if Paul says it is good and offers this variant rule, then it is good and others can probably understand it.

Play-Balance:  This game seems to be even balance, even with the differences in counter units AF/DF and the amount of Republican counters in the beginning.  It might be 55% to 45% Republican/Nationalist, but that is just a guess and is still close to be evenly balance.  

Like all wars, after the battle, out come the reporters.  The man in the middle is Ernest Hemingway with 2 others, one Soviet (the "cool" one with the backwards beret) and one German (looking like he is POW at a concentration camp).

Summary: The game is very good and fun to play and easy to learn. Only a small number of counters to be mounted and cut out, a short amount of rules that answer all the questions and pretty much errata free, and inexpensive - what more could one ask for?  I know, maybe one or two of Mahou Cinco Estrellas (a very good and tasty Spanish beer) should come with the game. 😂 

Needless to say, like the majority of games I play these days, I enjoy this one.  Not sure why I didn't look at it sooner. 

Paul has another six "ground-pounder" Spanish Civil War games available with one Spanish Civil War Air game,"Muerte Desde Arriba" (which I just bought). These are in order by month and year of the actual battle, not published date -

No Pasaran - Battle of La Coruna Road (Jan 1937)
Sad Days of Battle - The Battle of the Jarama River (or Rio Jarama) (Feb 1937)
Black Shirts, Red Blood - The Battle of Guadalajara (March 1937)
Viva La Muerte - The Battle of Brunette (July 1937)
Courageous Tragedy - The Battle of Belchite (August-Sept 1937)
Breaking Teeth - Battle of Teruel (Dec 1937) (this one)
Tercio De La Muerte - The Battle of the Ebro River (or Rio Ebro) (Jul-Aug 1938)

There is a lot more interesting history on this battle at Spanish Civil War.org. Unfortunately, I believe this site is a labor of love and as it is not very active (parts since 2010, under construction for a very long time), but the primary battles are up.  One can also do a wiki search and get the gist of the why's and hows of this civil war or buy one of the recommended books listed in the rules. 

Soapbox Time: There is  one more thing I am going to say about this battle as it is true in every war ever fought.

Civilians were killed and maimed in this battle like the present one with Hamas-Israel and in all wars past and probably the future.  

There is no such thing as a civilian casualty-free war. People need to learn to  think about this before engaging mouth and realize the simple fact of life that while civilians are not true combatants,  civilians will always be involved in most, if not all in their country's war, whether thru giving first-aid, making the weapons of war or being in the area of a battle or supplying replacement soldiers. The only way to stop civilian casualties is to stop war, period.  I do know I would like to have been out of that job when I was in (military).

But then, would we be playing wargames learning a little bit of the history of a battle or Euro-Trash games like rescuing kittens who lost their mittens?  Ah, things that make one go "bluhhhh".

Oft the box.
Honestly, thank you for stopping by! I would like to hear any comments you may have on the game, good or bad.

I just found these two newsreel shorts made for the US movie audience on the Spanish Civil War, named "Spain in Revolt". There are three parts, however, part one was lost and has never been found. Parts two and three are available to watch and here is where you can download or watch (Google has imposed a size limit now on video uploads to the blog, easier to send someone to where it is stored.).

For part two go here and for part three go here.

-ab

This blog is considered to be a living blog. Changes will be made to it as needed to clarify, correct errors or update with new information.

answer - Cross-mouse cards!  yeah this does not make sense.  It was the answer to a riddle, but it got deleted. 😒

19.11.23

Operation Fustian "The 1st Bridge Too Far"

Title: Operation Fustian - The Battle for Primosole Bridge July 12-15, 1943
Price: $*
Designer: Paul Rohrbaugh
Graphics Designer:  Antonio Piñar Peña
Publisher: High Flying Dice Games
Published Date: 2020
 
Subject: Operation Fustian was a military operation carried out by the 1st Parachute Brigade, part of the British 1st Airborne Division during the Allied invasion of Sicily in July 1943. The operation's objective was to capture the Primosole Bridge across the Simeto River.

Abbreviations Used: Arty=Artillery, ACT=Activations, AB=Airborne Brigade, AP=Axis Player (Italian,  German), BP=British Player, CB=Coastal Battalions (Italian), CD=Card Draw, CF=Combat Factor, DR=Die Roll, Inf=Infantry, MG=Machine Gun (German), MP=Movement Point, 1D6= one die six, Paras=Paratroops (British), CE/RE=Combat/Royal Engineers, AT=Anti-Tank. (page 3)

Scale:  Each hex is about 1/2 mile across and each turn is 8 hours of time. Inf/Paras are companies in size and armor units are 4 vehicles (when reduce, 2 vehicles). (see 1.2)

Components and Physical Quality: The graphic designer for this game is Antonio Pinar Peña and as it was said back in 1985 on SNL's Fernando's Hideaway - "Dahling, I have to tell you something. And I don't say this to everybody, your graphics look mahvelous!". 😀
 
The game map, player's aid, and counters are fantastic.  I really do enjoy his graphics and rate him in the top 10% of his profession. As of this review, he has graphically designed 29 games.  I wish him luck in everything he does.

Counters: Eighty unmounted double-sided counters that are aprx 14mm (9/16") in size on what appears to be 110lb weight paper stock.  
 
There are 16 counters of Italians in grey-green, 13 counters of Germans in dark gray (or black, just calling it as I see it) (including one Luftwaffe support counter), 24 counters of British in khaki (including one arty and naval support counters), and twenty-six  counters of Low Ammo/Entrenched counters. Last, but not least, the game turn counter. 

One will need to mount the counters or have HFDG do this for them, with a cost involved.  So why have HFDG mount your counters? Well, to get them lined up is not so easy.  Plus, the cardboard HFDG uses is pretty nice and importantly, one less thing to do before playing the game. One will still need to cut out the counters.

Game Map: An excellent realistic good looking game map... Honestly, I can smell the fields and the water.   This is just a small sample of the 8.5" x 11.0" game map on the right.

Players Aid Sheet:  Highly important. Not only is the Turn Record Track on this, but also the terrain effects for movement and combat.  And the Random Events Table that is used when the 1st Joker is drawn. (see 1.0)

Complexity:
Introductory, with no variant rules, but do not let that nomenclature fool you, as it is no beginner's game.  Simple yes, simplistic no. It has a lot of very good ideas and plays like games four times it's size and expense.

Rules: 
Would you believe 6 single pages? The rules are nicely printed on high quality paper with a good feel to them. Not some 10 lb copy paper, but true printer heavy paper.  What is nice about this rule set is that the important rules are pre-hi-lighted in yellow.  And saying it has 6 pages is not true. Pages 3 to 6 have the rules, page 1 is just the title page and page 2 is a chart showing the units and their formations.
 
OK, this might seem like I am confused, as I will be jumping around.  To be honest, I am, as the weather is playing havoc with my head.  I have listed the rules each paragraph is talking about like so (see #.#).

Player Supplied Components: A standard card deck (or the HFDG card set) is a must and as is 1D6. (see 1.1)
 
Deck Setup:
All of the cards are combined into one deck, including both jokers and all face cards.  (see 1.0)
 
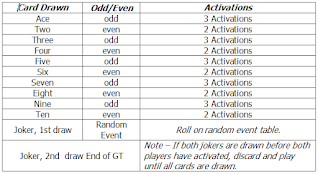
The chart to the left shows how many acts a card gives.  BP uses Red cards while the AP uses black. Note: I think I included everything a certain card draw does (such as face cards).

It is important to know to ignore the 2nd Joker if it is drawn before both players have been able to activate and play until all cards are drawn. If not the last turn, shuffle the deck, advance the turn marker and continue play. Game lasts 11 turns. (see 1.2)
 
Please do note that the card draw is used for the number of activations available to a player, with each activation being used to allow either combat or movement or entrenching a unit or recover once per unit per round (CDs), with many rounds in a turn.  (see 3.0, 3.2, 3.3, and 4.0)
 
And yes, there is a card set available for the game.  From HFDG, cost is $*. Order from them by clicking here. Enter which card set you want to buy on the last page in the box at the bottom.
 
Is it needed? Only you can say that.  I find it has all of the information needed in a very easier to read and understand format as shown to the left.

Note: $* means I have no idea the cost.
 
Game Setup:  The Axis Player sets up first using the setup guide.  (see 2.0, 2.1,  and 2.1.1)

The British sets up second according to the setup guide and conducts the paratrooper/glider landings  and sets up the British Reinforcement schedule. (see 2.2, 2.2.1, and 2.2.2)

And don't forget to reshuffle the card deck to start the game!

Formations:  In a lot of games, one doesn't need to keep track of unit formations, however in this game formations are important for the correct setup and stacking (allows up to 2 units to share a hex). (see 2.1, 2.1.1, 2.2, 2.2.2, and 3.1
 
Each country has units in formations that are color coded representing paras (considered inf for play), inf, and armor.  AT and Combat/Royal Engineers do not have a formation stripe and can stack with any nationality unit. (see 3.1 and 5.0)    

Special Units:  Some units have an asterisked * to indicate these are units with special abilities. AT, Armor (Tank), and CE/RE have an *, allowing these units to increase the CF of any inf unit it is stacked with by 1 or said unit can attack with their own CF.  (see 5.0, 5.1, 5.2, and 5.3)
 
Armor units in addition to the *, have a red square under their MF to signified that the BP needs to roll 1D6 when the tank unit enters a non-bridge river or canal hex side, or enters a cultivated hex.  I believe it is to see if the tank unit gets stuck in the mud (see 5.1.1). 
 
Armor has the ability for one armor unit to freely stack in a hex with 2 other units (and use it's +1 CF increase). There is no Zone of Control and combat is voluntary. (see 3.1, 4.0, and 5.1

Support attacks such as Air, Arty, and Naval are resolved by 1D6 and do not require an activation.  (see 4.0 and 5.4

Units can "entrench", which offers a +1 CD attack modifier (or +1 DR if attacked via Air, Arty or Naval), against the entrenched unit when it is attacked. (see 3.2)

A reduced unit can attempt a full recovery with a 1D6 check.  (see 3.3)
 
Combat: Units have a range of 2 hexes.  Units can fire into but not through hills and cultivated hexes.  Naval, Air, and arty support units can attack any unit (no range limit.). Remember, a unit can either move or have combat, not both from an activation during a round. (see 4.0)

Add the hex terrain modifier, subtract the CD bonus modifier if an AT or Armor is stacked in the hex. This is used even if the target unit is 2 hexes away.  The engineer is used the same way, EXCEPT it can only subtract the CD bonus if attacking 1 hex away. (see 4.0, 5.1 and 5.2)
 
Low Ammo: The BP can suffer from low ammo if the BP draws a face card when resolving a Paratrooper unit's attack.  Units that suffer this have their CF reduced by 1.  Axis Player and British reinforcement units do not suffer this.  And when any BP reinforcement units enter the game, all Low Ammo markers are removed.  (see 4.1

Winning the Game:  The Axis Player wins by controlling one or both hexes of Primosole bridge.  The BP wins by controlling both hexes and having 1 to 4 units north of the Simeto River.   (see 6.0)
 
Playing Time: From 2 to 3 hours, easy.

Solitaire Playability (Scale 1 to 10): I would say it is about a 9.   Remember, just about any game can be played solo. This one is no different and is how I played it, still fun and without the bother of having to supply the beer and chips to an ungrateful guest complaining about using cards.
 
Addenda:  Yes, just a couple of lines.  And here it is -

Operation Fustian
Addenda, November 2023

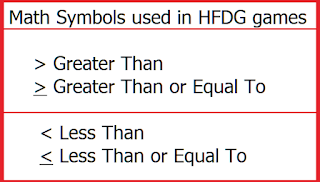
2.2.1 Paratrooper Landings (correction):  A Paratrooper unit is unaffected if the CD is less than or equal to 4 (the underscore beneath the less than sign is missing).

3.0 Activations (correction): Disregard case “d” as this is holdover text from the play test version of the game that should have been deleted. Rule 4.1 is correct and the only way by which the Low Ammo markers can be removed.

3.2 Entrenchments (addition). Units in Fortified Terrain may not entrench.

Player asked Clarifications:  Several questions have been asked these past few years concerning the game.  Here are the answers.

 1. Per 4.0 the modified CD result is compared to the attacking unit's CF. If the modified CD is less than or equal to the attacking unit's CF the target is reduced; if greater then there is no effect (attacker missed).
 
2. Per rules 1.0 and 3.0 each unit activates individually. When activated an activated unit can do ONE of the listed actions in rule 3.0. Per rule 5.1 an activated attacking unit can have its CF increased if stacked with an armor or AT unit (and/or Engineer unit).
 
3. Since units activate individually, multiple units can attack the same target but each requires its own activation and each of their attacks are resolved individually.

4. Per rule 4.1 the low ammo markers are removed as soon as any British reinforcement unit enters the game. There is no other way to remove a low ammo marker.

5. Per the rule 3.1, one British tank unit stacks for free, so it can stack with 2 units (making 3 to the hex).
 
Not part of the errata (sorry, I mean "addenda") is just something to be aware of -  there are CD modifiers, meaning a "card draw" modifier (such as "entrenching") and there are CF modifiers, meaning Combat Factor modifiers (such as "Low Ammo") and a Die Roll modifier (such as the "Arty, Naval and Air support" attacking an entrenched unit DR) in the game.

Play-Balance:  The game is finely balanced, giving either side a 50% - 50% chance of losing or winning.  That is until the British reinforcements arrive.  At that point, the low ammo chits are removed, the armor adds another +1 CF and the Axis player better hope that "lady luck" comes into play.  IMHO, the British chances for the game goes up to 65% to 35%, still possible to win for the Axis, though, especially a "wily Axis player".
 
Airborne operations were always risky and problematic affairs and this game, though small in size, is bigger in stature than many games that are larger and cost a hell of a lot more, shows this in detail.    
 
It is a very intense game and using the card draw system for activations (movement and resolving combat) combining said activations with entrenching (digging in), rallying (recovery), low ammo, having certain units able to improve the attack and defense, plus the landing of the paratroopers (which was an actual mess for the battle), make for a daring game of cat and mouse.  I found it fun, easy to understand, and a hoot to play.  
 
Soapbox time: Why use playing cards for activations?  This is a question I am asked from time to time, as really there is no simple way to show the frustrations or the chaotic nature of combat. Minutes seem like hours, seconds seem like minutes, everything speeds up or slows down, at least from what I remember. Some parts of a unit may attack or not. I remember there were several people in the platoon during combat, who even when they fired their weapon, didn't aim for people and some folks hunkered down without firing their weapon.  Many a time, one could hear rifle fire after the battle, just incase Gunny did a weapons check.
 
Pulling chits (as some of HFDG games use) is one way. But what if one doesn't really have the entire OOB of units or doesn't want to have tons of chits? Right!!! Using a card draw system allows a designer to show the stop-start motion of combat, without resorting to having more pull chits for leaders or other rules than necessary. I really do like this way of gaming.  It allows a good play without having an umpire.
 
Will I play it again? You bet.  Right now it is my game of the month, just edging out  "A Scourge of Stone and Spirit: The Siege of Harfleur, 1415".  I haven't had fun like this in a while and I actually owe it to "Guarding the Land", a PBG for getting me back into playing games.  

Let me know how you like this game in the comments section. I would appreciate knowing your thoughts on the game, what you may or may not like.  And of course if you find anything wrong in my review. 
 
Happy Thanksgiving 2023,
-ab


This blog is considered to be a living blog. Changes will be made to it as needed to clarify, correct errors, or update with new information. Also, this is my opinion, right or wrong.