12.9.18

Mounting and cutting out counters

There are those gamers who prefer to buy their games with die cut counters and there are those gamers who don't mind mounting counters, cutting them out, and enjoying the fruits of their labor while applying band-aids.

I am one of those. I have enough scars from slicing off finger tips (true stories), cutting hands and plain just looking like one was in a tiff with Miss Loretta who did not argue, but would just tell you, "don't make me cut ya". 

I have developed my own way of mounting and cutting out counters thru out the years, and what tools I use. It may not be perfect, but it works for me. Heed the warnings: 

WARNING!!!! GO SLOW!!! Neither this blog nor myself will be held accountable for your actions or lack of ability. Know your limitations.

With the warnings out of the way, here is how I mount and cut out counters:

Background on the different tools used and why:

  • 12" steel rule
  • 18" steel rule
  • utility knife (aka "U.K.")
  • glue stick (GS) or 3M spray glue 
  • X-Acto with #11 blade (not used by me)
  • a cutting mat - 11"x17" and/or larger
  • backing for the counters: white, 24 lb (I use Ultra Pro Magazine Size Board for comics. Acid free and THIN!)
The 12" ruler has a rubber backing on it (rubberized electrical tape, I put on) to keep it from slipping. The 18" ruler has a cork backing, but I only use it when I have 11"x17" game maps to cut out, as the cork is aprx 1/32" of a stand off and sometimes the ruler will slip a little bit, not allowing a perfect cut. While the rubber backing on the 12" rule grabs, doesn't slip and is thinner.

The U.K. is used instead of a #11 X-Acto type knife blade, because, I have big hands and can hold it easier. The blades on the U.K. are not any wider than the #11 blade and to me is safer to use.  

One can use either a glue stick or 3M Adhesive spray. Though to be honest, the 3M spray requires one to be outside and goes everywhere (nothing like having arm hair stuck together). The glue stick is easier to use, especially inside a house and holds everything as well as the 3M spray. I tend to buy 10 of them at a time when they are on sale for school supplies (50 cents for a BIG stick).

And most important, a self healing cutting mat. My first mat was 11"x17" in size and perfect for smaller 8.5"x11" size projects. I recently bought a larger cutting mat as my projects are getting larger, bigger than letter size, almost 11"x17" in size.  Save yourself some money and buy a larger one. You will use it sooner or later. :)

BE CAREFUL!


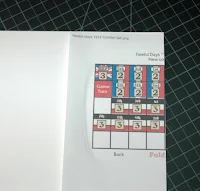
Here is the counter sheet I am going to mount. It is a set of replacement counters that I made for a WWI pocket game, called "Fateful Day 1914". It isn't very large and has both a front side and back side to it, with fold lines.  

Since the fold lines are visible, fold to crease the paper on the "fold line". 

Once the paper has been folded, coat the backside with the glue stick.(I use the purple kind to easily see where I miss spots  :)  ) then line it up and press it down, lining up the front and back correctly. In this case, if the lines are folded, it can be glued on both sides and glue from one of the edges, as this lines everything up correctly.

Here are both sides glued down. Don't mind the wrinkle as it's outside of the area needed. As long as there is no wrinkle in the counter art or project, everything is good.

Let it dry for 10 mins or so. And rub it down!!! Note: Some printing paper used will require longer drying times and possibility of being put under a weight for a few hours.  You won't know until you mount.

I am using a new protection product after mounting the counters but before cutting them out, Krylon Low Odor Clear Finish, Matte as a permanent, protective coating. This protects the counter better from wear. Why this one brand? Very low odor, and cleans up my hands and spray tip with soap and water. Easy to use. 

👉 When using a protective spray such as this product shake, rattle, and roll the can for several minutes! Important to get everything mixed.  Spray a very light coat, let dry, and then spray another one.  I usually spray 3 light coats as one doesn't want this clear coat to run and cause problems.

Don't forget to let it dry for several hours between coats and before cutting out.

👉 If you use such a product be sure and test it on your counter sheet BEFORE using on everything. As a wood worker, I have ruin a couple of finishes by using a clear spray product to protect the wood and finish without testing it out first. And be sure to let your ink dry before coating!!!


WARNING: 
Line up your ruler and make 2 or 3 light cuts. NEVER bear down heavy and try to cut thru in 1 cut. You will probably ruin your cut and possibly hurt your self. 

Remember to go slow, keep finger tips out of the way and keep the blade as straight up and down as you can.  Be Careful!

Depending on what you want to do, I carefully cut the counters in strips. Look carefully to see what is the least amount of work using scissors will be. In this case cutting in strips in either direction will be the same amount of work, i.e. scissors cutting.  You can use a U.K. or #11 knife if  you want, just easier on me to use scissors.

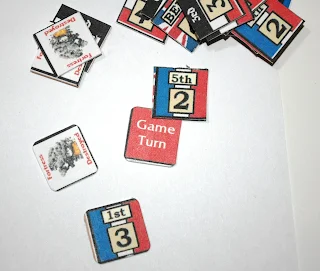
Using a pair of scissors, I cut the counters apart.  This is one of the reasons why I use the comic backing board. The counters are thick enough for me and easy to cut out. 

And for the grand finale, clip the counters to round the edges for a more posh look. 

You can see what I use here for rounding the corners. Several sizes are available, I just found that the 2.5mm rounded counter is the best for me as it is good for 1/2" and up to 1" counters.

👉 Take your time, measure twice, cut lightly several times, and above all, be careful.

Yes, lots of warnings, just be careful.  Don't be in a rush.  
 
And you too can make your own mounted counters. I like using the comic backing board as it is sturdy enough and thin enough to cut thru with scissors. 
 
Also, make sure you make a copy of those counters you are going to be mounting (BEFORE CUTTING) and use that. That way you still have the original counters in case you lose one. And, yes, this is legal.  One can always make a copy for personal use. Just don't copy and give away or sell, that is verboten.

Enjoy and let me know how your mounting project came out!
-ab


This blog is considered to be a living blog. Changes will be made to it as needed to clarify, correct errors or update with new information. And I apologize, but this review may contain references to graphics that are no longer on this blog. Long story, but it was Google who removed them.

2.5mm Gaming Counter Cutter

Note - this post did use a lot of photos, so just use your imagination...

A long time ago... 

I used a toe nail clipper for clipping the corners of gaming counters (aka "tags"), and I was pretty darn good with it. But over the years after losing hand dexterity  and strength, these were not suitable anymore.   


A search went into action and I found a clipper that is designed for trimming, and or rounding corners on all sorts of craft projects, cards and counters.  I read about it on a site (sorry, I don't remember where) and decided that these were what was needed.

The device:
is correctly known as a "2.5mm Radius Deluxe Corner Rounder Punch Cutter by Oregon Lamination Premium" available online at Amazon for $54.50 with Prime shipping.

Originally, I had bought the 2mm version and liked how it clipped the corners of the smaller 1/2" counters, but on larger counters, it was hardly noticeable. Sent them back (one of the kudos of buying from Amazon) and bought the 2.5mm. Very different, very nice and works well on 1.5" size counters. 

The counters that are clipped:

Here are two 1/2" counters from "Road to Richmond" by SPI from a long time ago. The counter on the left was trimmed with this device, while the counter on the right couldn't pass inspection.

Here are larger counters from "Swashbuckler". They are 5/8's and larger. Which chair would you prefer to sit in at the table? The fresh nice looking one or the rickety one?

This is a whole lot nicer than toe nail clippers for sure.  If I could afford to buy another one of these I would get the 4mm for rounding corners on the card sets that one can buy from various gaming companies.

Yeah not a great photo, but one can see 2 Soviet trucks (from Panzer Blitz, no less) The truck on the left is a Soviet Guards taking part in the victory over Germany. Notice how much nicer it looks with rounded edges. While the one to the right is from a Soviet beet farm that had the commissar shot due to ragged tags showing. 


Now for the bad:
The clippers are not highly rated on Amazon or on you tube videos. The three main problems seem to be #1 - too strong of a return spring, #2 - a weak pivot latch that cracks, and #3 - nothing to stop the handles from being pressed too far down (thereby creating problem #2 causing the pivot latch to crack - catch -22, huh). 


However, this is fixable:
Yes, it is and I can show you how on the #3 problem, thereby hopefully, not leading to #2 and allowing one to keep the strong spring, without being force to change it out.


Here is the fix for the handles:
See the little blue block?  That limits how far the handles can be squeezed, thereby hopefully, keeping the pivot latch from cracking from too strong of a grip and spring. It is aprx 1 and 1/8" long, 3/4" square. 

The top blue insert is removed and 2 holes are drilled. Then using very small screws attached it to the blue insert. I drill each hole at an angle to each other instead of side by side, hopefully to make the holding power stronger. Since the plastic is an oily plastic, there might be a glue that will work, but probably not and definitely not super glue. 


The fix for the broken pivot latch is a bit more work, and requires taken the device apart. Once apart, gluing the broken latch, and drilling a hole to accept a steel pin or small bolt to reinforcement the glue joint. At this time, the spring can be replaced with a weaker one. This fix is well documented in a video that can be found on you-tube...  and right here (and thank you to the original poster - good job):

And two more things:
1) If a counter is not perfectly cut square (90 degree angles), the clipped area will not be rounded as it can't be inserted into the pit. A 3mm or larger might be needed for larger counters. 

2) See those two holes? They hold the anvil of the cutter to the frame.
The holes are a little rugged and the fix from the company is a piece of plastic tape over them.  Being from China, it is not very good clear tape and needs to be replaced.  Easy to do, just be aware of it. 
 
What I did was cut a piece of card stock the size of the anvil and using double sided tape placed it over the anvil.  Having this makes sliding the counters easier.

Outside of the few problem areas, I have been enjoying having nice corners.  After making new counters for the games I play, I spend the 20 to 30 minutes extra and round the corners to make them "extra nice".  :D

-ab

This blog is considered to be a living blog. Changes will be made to it as needed to clarify, correct errors or update with new information.  And I apologize, but this review may contain references to graphics that are no longer on this blog. Long story, but it was Google who removed them.

3.9.18

Nemesis

nem·e·sis
/ˈneməsəs/
noun
synonyms: "archrival", "adversary", "foe", "opponent", "arch enemy"
  • a long-standing rival; an archenemy
  • a downfall caused by an inescapable agent
  • a conflict simulation by High Flying Dice on "The battle of Abbey Ardenne", 7 June, 1944
The Game:   Nemesis, The battle of Abbey Ardenne, June 7, 1944 is published by High Flying Dice Games. Designed by Paul Rohrbaugh and with graphics by Bruce Yearian, it came out in 2016.

The game is considered a mini game, but to be honest, this is a misnomer. There is nothing mini about this game, from the quality of the game graphics by Bruce and to the execution of  play as designed by Paul.  It's quality that one has come to expect from HFD. Priced at $*, it is a bloody bargain.

Canadian Nemesis: The 12.SS-Panzerdivision was positioned 50 miles behind the coast, had 20,540 men and a full establishment of 150 tanks (including Panthers and Pk IV's). This unit was a fanatical Hitler Youth formation raised to believe in the German master race and the Fuhrer. Two thirds of these soldiers were 17-18 years of age and had received sophisticated battle training starting at the age of 15-16. They were a dangerous combination of patriotism, self-righteousness and youth.  

The idea for this Waffen-SS division was first proposed by Artur Axmann, the leader of the Hitler Youth, to Reichsführer-SS Heinrich Himmler in early 1943. The plan for a combat division made up of Hitler Youth members born in 1926 was passed on to Adolf Hitler for his approval. Hitler approved the plan in February and SS-Gruppenführer Gottlob Berger was tasked with recruiting. SS-Oberführer Fritz Witt of 1.SS-Panzerdivision "Leibstandarte-SS-Adolf Hitler" (LSSAH) was appointed divisional commander. Personnel from the LSSAH provided the regimental, battalion and most of the company commanders and upper NCOs for the division, about 2000 personnel was transferred. In September 1943, the division had over 16,000 recruits on its roster, undergoing training in Beverloo Camp, Belgium.

With the cadre (the upper NCOs and Officers) of the 12.SS-Panzerdivision "Hitlerjugend" coming from other SS-Divisions, (especially from the LSSAH on the Eastern Front, where fighting between the combatants was kill or be killed), the indoctrination (i.e. Boot Camp) was often brutal for the Hitler Youth. The 12.SS-Panzerdivision "Hitlerjugend" after 2 years of training were well trained, and obedient from this brutal training.  

Standartenführer Kurt Meyer commanded the three battalions of the SS-Panzergrenadierregiment 25.  With this regiment, Meyer and the 12.SS would become the nemesis of the Canadian Army in Normandy.

June 7, 1944:  SS-Panzergrenadierregiment 25 under the command of Standartenführer (Colonel) Kurt Meyer had moved into the area very early on June 7th, moving at night on June 6th, to avoid the constant Allied air patrols and naval bombardment. Meyer established his headquarters in the Abbaye d'Ardenne (actual name L' Abbey d'Ardenne),  because the Abbaye turrets gave an excellent view of the country side facing the channel. It was from this turret that the discovery was made that the Canadian 9th Brigade was advancing toward Carpiquet Airfield and had an exposed flank.

When the 9th CIB and the Sherbrooke Fusiliers began to advance on 7 June, they were met by the reminding troops of the 716.Infantrydivision and some of the remaining 21. Panzerdivision.  As they pushed thru these units into Buron and Franqueville, and Authie, Standartenführer Meyer's SS-Panzergrenadier Regiment 25, composed of two fresh Battalions (actually three, but one was held in reserved), 50 PzKpfw IVs of the SS-Panzerregiment 12 and the 3.Battalion/SS-Panzerartilleriregiment 12, attacked from the north-west into the exposed 9th CIB's flank at aprx 1000. The fighting was vicious hand to hand, close quarter battles. The 9th CIB was forced out of Authie and Buron after suffering heavy losses. The SS-Panzergrenadier Regiment 25 also lost aprx 300 men and 15 tanks.

With the help of the big naval guns, and the 12 remaining Sherbrooke Fusiliers tanks and a brief rest, the 9th CIB fought their way back into Buron and Authie, at aprx 1300, forcing the Germans in turn to withdraw. However, the 9th CIB was decimated during this counter attack.

The fighting was so fierce that a street corner in southern Authie was named "Place des 37 Canadiens" in honor of the 37 Canadians killed there that day.

The 9th CIB casualties for June 7 lists for the North Nova Scotia Regiment 84 killed, 30 wounded, and 128 captured and Sherbrookes casualties were 26 killed, 34 wounded along with 28 tanks destroyed or damaged.

The Germans also paid heavy with the Sherbrookes claiming to have destroyed up to 35 German tanks (Pzkw IV's), thus reducing the effectiveness of the SS-Panzergrenadier Regiment 25. 

After this late day attack, the 9th CIB was forced to withdraw to its D-Day positions, having suffered more casualties than any unit on Juno the previous day. 

Abbaye d'Ardenne atrocities:  The Abbaye d'Ardenne quickly filled with POWs captured during and after the fighting on 7 June. These were soldiers from the North Nova Scotia Highlanders and the 27th Canadian Armored Regiment (CAR) (The Sherbrooke Fusilier Regiment). Ten of the POWs were randomly picked and dispatched to the chateau adjacent to the Abbaye; the rest were moved to Bretteville-sur-Odon. An 11th POW, Lieutenant Thomas Windsor was brought out to join the group after the first ten men had been selected. That evening, the 11 POWs were taken to the chateau's garden and killed.  

On 8 June, near noon hour, seven more POWs, all of them North Novas who had been fighting around Authie and Buron, were brought to the abbey, interrogated and sent one by one to their deaths. In 10 minutes it was over - they shook hands with their comrades before being escorted to the garden, where they were each shot in the back of the head.

When Abbaye d'Ardenne was liberated by the Regina Rifles shortly before midnight on July 8, their members discovered the body of Lt. Williams. Lt Williams and another man went missing when scouting for wreck armor. It was many months before the rest of the murdered men were found.  

It is possible that as many as 156 Canadian prisoners of war were murdered by the 12.SS-Panzerdivision "Hitlerjugend" in the days and weeks following the D-Day landings. In scattered groups, in various pockets of the Normandy countryside, they were taken aside and shot. Many have not been found.  

Note - was it deliberate murder or revenge killings? That's the question that the Canadian War Trials couldn't answer. Meyer's was convicted on a few counts, such as being the commander that he was responsible for the actions of his men (pure bull shite as being in the military, I saw where section, flight, Platoon, Company, and unit commanders got out of this and hung others out to dry to take the blame.) Meyer's conviction was overturned from death by hanging (convicted Dec 1945), to life in prison, to being released after serving 9 years (released in 1954) and passing away about 7 years later from a bad heart. So, was it Meyer who gave the orders or was it his officers, NCOs or men believing they could do what they wanted? We will never know.

And here is where the review of the game begins...

Bloody unboxing the bloody parts of the bloody game:  Nemesis is composed of one 11"x17" sheet of heavy card-stock (on this sheet are 52 unmounted counters, a player's aid and the game map), a 4 page set of rules and a small addenda to the rules.  1D6 and a deck of cards will need to be provided.

The 11"x17" card stock is cut in half (follow the guide line) separating into two 8.5"x11" sections.

The first section is the actual game map that is aprx 8.5" x 6.5" in size with 1/2" hexes regulating movement. The terrain chart and various tracks are at the top of the game map and is the rest of 2.5" to make 8.5" x11". There is a compass rose showing north (North is at the bottom of the map) and a heavier line showing the limit of the Allied naval gunfire support. The map is just right.

Some might think the map is simplistic. But, if it was showing more terrain, it would be too much. Roads, woods, towns and villages are shown, along with the southern limit of the Canadian (and British) Artillery support and a compass rose. Nice touch on the compass. The area depicted is where the North Nova Scotia Highlanders regiment (Novies), the Sherbrooke Fusiliers Regiment and the 12.SS fought on 7-8 June, the Buron - Authie area.

The other 8.5"x11" section contains the counters and a Players' information card. These do need to be mounted. Of the 52 double sided counters,  37 counters represent the various information markers (such as "pin", "entrenched, etc"). Fifteen counters represent the actual combat units (and one possible reinforcement). Note: the white box is deliberate by me - I don't believe in showing all sides of counters as it is too easy for some to duplicate.

Out of the 15 unit counters, the Canadian player has 7 double-sided counters representing the Novies along with 2 British regiments (from the British 3rd Division on Sword beach), the King's Own and the Royal Ulster Rifles with 4 armor units in Brigades. And the German player has 8 double-sided counters, the SS-Panzergrenidier-regments 25, 26, attached arty, and two armor Brigades.

Germans are light grey, while the Canadians are green. There is also a number on the German counters and probably the Canadian counters as well. This number I know is red, as Paul uses "red" to signify that a unit is capable of firing up to 2 hexes away. 

And of course there is a HFDG card set that is available that replaces the regular card set. If you want to complete the entire experience, the grab these cards. They sure are pretty and interesting. To either look at them or purchase, all you have to do is click on the card to see them on the HFDG web site.

Now that is all out of the way, onto the setup and play of the game...

Preparing for play
Before starting the game, here is the latest addenda for the game and some of my own.

Nemesis - Addenda, August 24, 2018. New one - Sept 2018

There are a few places in the rules where “Disrupted” units are referenced. These should read "Pinned" instead:

  • case 3.2 Movement, page 2, line 1, word 3 "to an "undisrupted" enemy unit."?  Should read: "to a "pinned" enemy unit". 
  • case 4.0 Assault, Page 2, line 8 (under modify the DR as follows) "+1 Red AF unit firing on "Disrupted" armor unit." should read: "+1 Red AF unit firing on "Pinned" armor unit.".
  • case 8.0 Rally, Page 3, line 1 "both sides can attempt to Rally a "Disrupted" unit." should read:  "both sides can attempt to Rally a "Pinned" unit".
i.e. these are the 3 sentences with the word "disrupted". Just change the word to "pinned")

8.0 Rally (addition). 5 is the highest level either player’s Morale Level can be increased.

this also applies to Rule 9.0 Changing Morale Levels. 

1st, this fix...
8.0 Rally, seventh line (correction). This should read "if the DR is > the ML" (not less than).

2nd, and this fix...
8.0 Rally,  Lines 6, 7, 8 (correction).  A unit rallies if the DR check is < (less than or equal to) the player’s ML and fails if it is > (greater than)the ML.

The easiest way to fix in the rules is to switch the" <  " (less than or equal to) and the " > " (greater than) with each other. WOW, what a change, makes it easier to rally as all my games up to this point have been rough.  :D

2.0 Setup, line 6 (correction),  Place the Turn Marker on the 1000 Space of the Turn Record Track.

It's been pointed out to me that the correct times are correct on the game map game turn track. However, the rules are not correct then, (2.0 Setup, line 6, just change the time "1000" to "1300").


3.0 Game Play:  The game has 8 turns with many rounds, only stopping when both jokers have been turned over for a new turn or if an automatic victory has been scored by either player, ending the game. 

Take this card and shove it:  Each player turns over a card and the highest card wins that round:
  • If the card is odd, then the player gets 1 ACT. 
  • If it is even, the player can do 2 ACTS. 
  • If the cards are even then the player who had not preform an ACT in the previous  round can perform 1 ACT.  
  • If a joker is turned over then the player who drew it, rolls 1D6 for a random event. 
  • If a joker is turned over a 2nd time then the current game turn ends. 
  • If not the last turn, then the cards are re-shuffled, and game turn marker is moved up to next turn and play starts again.
3.1 Activations are the heart of this game Each activation (ACT) allows a player to do one of the following, in this order, in their turn (highest card or in case of a tie, the one who did no acts in the previous turn  gets a turn- see above 2.0):
  • Arty support combat
  • Air Support Combat
  • Move
  • Assault
  • Entrench
  • Rally.
Really, using cards is great. as I have said in previous reviews and probably future ones too, the use of drawing a card to see who goes, at least to me indicates battle much more realistic than ugo-igo games. One can see other ways of using this random movement of game counters by the use of "drawing chits" from a cup, etc.

3.2 Moving:  A non-pinned unit can perform the movement ACT. From hex to hex up to the movement allowance. Each type of hex costs mps, such as moving on a road is 1/2mp, into a woods is 2mp, entering a town is 2mp, etc.

A unit must stop moving when it enters a hex next to a non-pinned unit. Remember, no stacking and no entering hexes containing enemy units. 

4.0, (and 4.1, 4.2) Did ya hear about the peanut that was attacked "It was assaulted!":    A non-pinned unit can preform the assault ACT (aka attack).  If it is an armor unit, flak unit, or anti-tank unit, it can attack armor units up to 2 hexes (of course there is a penalty of -1 if not adjacent). And there are other +'s and -'s as well to the DR.  BTW, these units have a "RED AF".

If the attacker isn't any of the above, then a non-pinned unit that is attacking has to be next to the unit the player wants to attack.

And the player gets to choose which unit attacks and which unit is being attacked.   Attacks are resolved by adding up all the pluses and minuses (see rules: Case 4.0, Case 5.0 and Case 6.0) and adding to the DR (i.e. modifying the die roll).

  • Roll a 1D6, and with the modifiers, compare this Modified Die Roll (MDR) to the defending unit's defense factor (DF). 
    • If the MDR is < (less than or equal to) the DF, nothing happens. 
    • If the MDR is < (less than or equal to) 0 then the attacking unit is pinned. 
    • If the MDR is > (greater than) the defending units DF, then the defending unit gets a pin marker. 
      • If already pinned, then the unit must either immediately retreat (can retreat if needed (see rules) up to the units MF) or take a step loss (flipped over). 
      • If unable to retreat then the unit must take a step loss. 
      • If already flipped (step loss) and receives another pin result and can't retreat then the unit is eliminated. 
You may be wondering what's this "pinned" and "unpinned"?  Simple - a unit without a "pinned" marker is known as an "unpinned" unit. And can move, attack (assault), and entrenched. A "pinned" unit cannot move (unless forced to retreat), cannot attack, and cannot entrench (but if entrenched when it receives a "pinned" marker, the entrenchment stays. See rules 4.0, 4.1, 4.2 and 7.0). However it can rally. 

5.0 "O'really? I don't see a VW dropping on me!":  At the beginning of each turn (starting with turn 2), both players roll a 1D6 to determine how many artillery strikes are available for the turn (Canadians add 3), See Case 5.0 Artillery Support in the rules. One important rule in this section is "If target was pinned, it takes a step loss, No retreat option".
This is an interesting variation on having arty support, instead of having a set amount each turn as in a many games one gets a variable for the amount available. Remember this is for the whole turn, not for each round!

6.0 Typhoons out of the sun:  Canadian player also has air support. At the beginning of each turn starting with gt2, the Canadian player performs a DR for the amount of air support for the turn. One important rule in this section is "If target was pinned, it takes a step loss, No retreat option".

Don't forget to place the Air Support marker on the ML/Support Track. And remember this is for the whole turn, not for each round!

7.0 Entrenching:  An "unpinned" unit can perform an Entrenchment ACT and a unit can only entrench out in the open or a village.  While entrenched, the unit can't attack or move. But it does get a -1 to the DR. And if entrenched in a village hex, the the max is -2 to the die roll.

Note: if a unit receives a pin marker and is entrench, it stays entrenched until it is forced to retreat. 

8.0 Rally the troops:  Pinned troops can be rallied.  See the rules and the new addenda above.

9.0 Morale (ML) can be changed:  Both sides ML can go up for capturing towns or the Abbey and go down or up for each unit eliminated from the game. There is even an Automatic Win if one side's morale goes to 0. See the rules.

10. "Fortunes of War":  This is a neat little rule.  The German starts out with the "Fortunes Of War" marker. They may use it or not.  It can be used for a variety of things, such as a re-roll of any DR, return a unit, etc, but once used then must be passed over to the other player.  See the rules.

I like this little rule. It has been said, the "fortunes of men and mice go out the window when the fickle paw of a cat is around" . That would be a bloody bastard German player if they decide to keep it and use it on the very last round of gt8. OUCH.

11. "How to win friends and influence enemies":  An automatic victory is possible by reducing the opponents morale level to 0. The ML is changed while playing not at the end of a round or game turn and as a result, the game can be won or lost at anytime.  

However, if the game goes all the way to end of GT 8, then VPs are awarded for eliminated enemy units, town hexes controlled, exiting armor units via the players side (German south edge, Canadian north edge). 

ab sez: Oi Vey, See the rules. This is where the "Fortunes of War" rule (case 10) can come into play. 

12. Variant Facing:  Using this rule is optional. Basically, armor has a facing rule. The hex to the top of the counter and each side hex to that top hex is considered the frontal aspect and the rear aspect is consider to be the hex on the bottom and each hex to it's side. The rules explain this much better, than I could (plus I don't want to do a rules reprint here).

ab sez: this is one rule that I believe should not be a variant but one that should be used. I have seen this in other games and believe it should always be used as it is the chocolate to the peanut butter.  It adds that certain flavor that is missing from soup, sort of like adding Vegemite to one's soup. 

Time for the buns ratings:
  • Complexity of the game: LOW
  • Solitaire: HIGH (not much work is needed)
  • Enjoyment Level: HIGH (imho)
  • Nail biting: 7 fingers worth. 
  • Historical Level: Medium - this game has a good historical background, even with the two British regiments included. :D
  • Length of typical full game: About 1 to 2 hours, in the beginning, but after a few games, 30mins to an hour.

After Thoughts Part One:  Now this is all of my own thinking - could be wrong or be right, Murdering the English language is my forte. Leave a comment if you can make this review better. And it is my soapbox....

The game, imho, is a great beginners and a low-intermediate level game with just a tad of hardness if the variant rule is  used. The game uses a tried and true movement/combat system using a deck of playing cards as the random generator. It has a wonderful simple map and counter design work by Bruce.  And the counter mix is just right, under ten counters for each side. Also, any mistakes are mine, and mine alone in tis review. Mea Culpa

At aprx 0800 hrs, before the 12.SS first attack at 1000 hrs, the Canadians were in Buron and Authie and only aprx 1 mile away from Abbey Ardennes.  The 12.SS observers saw this and gave word that the Novies were in both towns and had an exposed flank, just ripe for attack.

Aftermath:  The game is very well executed. I found myself angry when I lost a unit of our laddies, glad when I destroyed a 12.SS unit and tired when I finished a game. It's a heck of a game. 

Playing this game is making me want to dig out Squad Leader  or Panzer Leader and set up a scenario on this battle.  Nahhhhhh.

If you don't have this little gem, you owe to yourself to purchase it. The price won't break your wallet and it fills a hole where other game publishers fear to tread - Canadian versus  the 12.SS.

Update:  ATO brought out "Five for Fighting" pocket battle games, 5 beach landings on D-Day!. Reviewed on this blog at this link.

This also has Juno Beach, where the Canooks can go after more 12th SS.

This is my player aid for the game.  You can use it, just no selling, please.
 

Enjoy the game! 
-ab

Though this movie has nothing to do with D-Day, it has a Canadian unit with "pipers". Piper's are good. I like the pipes and drums as nothing like these make the hairs raise up on the back of the neck.


This blog is considered to be a living blog. Changes will be made to it as needed to clarify, correct errors or update with new information.
And I apologize, but this review may contain references to graphics that are no longer on this blog. Long story, but it was Google who removed them.

1.7.18

Thunder Gods, a game of USN survival, 1945 - updated 07-11-18

Title:Thunder Gods
Price: $*
Designer:Paul Rohrbaugh
Graphics Designer: Bruce Yearian
Publisher: High Flying Dice Games, LLC
Published Date: 2009/2013

The Game:
Up for review is a game about Kamikazes attacking the United States naval forces during the  battle of Okinawa 1945. Originally published in Panzer Digest #5 by Minden Games, 2009, the game version I am reviewing came out in 2013, as published by High Flying Dice Games, LLC. Designed by Paul Rohrbaugh with graphics by Bruce Yearian.  Though a two player game, it can be played solitaire very easy.

"Thunder Gods" is comprised of three separate 4"x6" game maps and aircraft counters (the counters need to be mounted and cut out); a 4 page very concise and well-written history by Paul; a set of over-all rules for "Thunder Gods"; a small 1/6 of a sheet of addenda (errata) and a set of rules to join all three maps and counters together for a much larger and longer game. Cost for this game is very inexpensive, only $*.

There is also a card set available for the game from High Flying Dice Games. I don't have this card set, yet. I do have several of these card sets and I can promise you that they make the game easier than just using a regular deck. All the math of dividing numbers is done for you on the cards, Special abilities instead of having to consult charts, etc, are on the cards. Even with the cost of these ($*) plus the cost of the game, all is $* and costs much much less than the average game from one of the other gaming companies. And for that alone these are worth it.

Players will need to provide a deck of regular playing cards, if not using the card set and unlike most games from HFDG, no dice (for combat) is needed - nice. Though "Thunder Gods" is consider as an introductory level game, there is enough in the game to make a player(s) pay attention to their game play.

Note: "$*" means prices have change and I am not sure what the cost is anymore.

The game maps:
There are 3 game maps - each game map shows either three Fletcher Class DDs (imho the best of any destroyers ever built), or three LST's (representing cargo-transport type ships) and three Carriers - one fleet CV (Essex class) and two CVL's (Independence class), the primary targets of the Kamikaze attacks. The game maps are divided into an "inner defense perimeter" circle, an "outer defense" circle and the "CAP zones" (US close air patrol).

The background photo on all game maps is a forward looking oblique photo of the ocean. If you position the game map with the ships stern facing you, one can see the waves and as you follow the game map towards the front, one can see clouds off in the horizon. Very nice work Bruce!

The ships:
Each ship has two ratings related to their play - a Defense Factor, and an Anti-Aircraft Factor (for attacking the kamikaze acft). Victory Points are awarded for damaged, crippled and sunk ships.

Note the little boxes next to the US ships. When a ship has taken damaged, place one of three counters labeled "Damage" (with a flip side of "Sinking") in the correct box. When it is "sunk", flip the damaged counter over to "sinking" side. Oi vey.

just some of the aircraft graphics
The aircraft:

The acft also have an AF and a DF printed on the counter.  IJ Acft are also divided into "E"scort and "K"amikaze. "E"scorts can attack US aircraft, while "K"amikaze can only attack ships.  And US fighters can attack both IJ acft. Bruce made sure we could see whether it was an Escort or not. Kamikazes have a red number while Escorts have a black number.  

The counters on one game map consist of:
For the USN, seven counters (and depending on the game sheet):
four F6F Hellcats or F4U Corsairs and three damage/sinking counters. [use these in the little boxes, next to the ships as they get damaged]

For the Japanese,  ten counters consisting of:
two Yokosuka D4Y Suisei (Judy) counters, one Nakajima B6N Tenzan (Jill) counter, one Aichi D3A Type 99 (Val) counter, five Mitsubishi A6M (Zeke aka Zero) counters in Navy and Army, one Mitsubishi G4M (Betty) counter with the Ohka MX7 on the backside and on one of the game maps the Kaiten counter replacing the first D4Y.

Each counter shows the plane type, attack factor, and defense factor, like the ships. And each acft has a damaged back side.

Game Play:
After cutting out and mounting the counters, it is time to get ready to play.  The Bun recommends to play either of the 3 games, one map at a time before combining all three maps together, to get a feel for the game.

Just remember though the game is low in price and is considered an introductory game, it truly isn't.  One can't just haphazardly  play the game without thinking. Otherwise that player will lose the game.

Rules are about 1/2 sheet in length and the game uses very clear concepts to simulate Kamikazes crashing into US Naval ships.    I am a firm believer that games have become too complicated and too long for normal play, that a low counter, less complicated style of game is the way to go, like this one.

The rules:

1: Setup:
Setup is pretty simple. Grab a normal card deck and remove one joker (leaving one for play) or use the Thunder Gods card deck from HFDG.  A randomly selected red card is drawn from the deck and a F6F is placed in the CAP zone A and one in CAP zone B. The Japanese player places all his aircraft near CAP zones A  or B, off the game map.

2: Play:
The Japanese player goes first using the selected red card from above. Then the US player.  Each player alternates drawing a card and chooses to either activate units or pass.  Red CD's are for the Japanese, while Black is used for the US player.  Face cards, Ace, can be frustrating for the US Player.  Depending on the card drawn, a player can do one of the following:
  • move, 
  • air unit attack another air unit
  • ship AA attacks
  • Kamikaze attacks ships
3: Movement:
Any number of acft may be in the same zone. Units moved from zone to zone (adjacent connected areas).  Please note, Japanese acft may leave the game map by moving into the "Transit Area from any zone. Once moved they can only leave this area by moving off the game map and they do earn VPs for this. It is assume that the Japanese acft are going to attack other ships around Okinawa. 

4: Air Attack:
Attacking is voluntary and there is no CRT to be used. Instead a card draw is used to resolved the air attack. Clever is all I can say.

5: Kamikaze Attack:
Instead of a move or attack (air attack), the Japanese player may do a Kamikaze attack.  Again, a card draw is used to resolve this.

6: Winning the game
Game lasts as long as there are Japanese  Kamikaze units left in play.  After the joker is drawn, and there are Kamikaze units left in play, then the deck is re-shuffle.  VP are scored by IJ aircraft exiting the "Transit zone" and by damage, crippled, or sunk US ships. Japanese player wins by scoring 20 or more VP.

A somewhat condense history:
Many books have been written on the history of the *Kamikazes - the hows, whys, and therefores Japan made use of this terror weapon, I am not going to go into any great depth on this history.   Suffice to say, that thru out the war, a pilot, who was possibly severely wounded or whose acft was damaged, might plunge his aircraft directly into a ship to try and destroy it, but this action was few and far between on both sides. 

For example, during the Battle of Santa Cruz (Oct 26, 1942) it is recorded that 2 IJN damaged acft hit the CV USS Hornet - a Val that crash into the island and a Kate that struck the bow. Though these 2 crashes only caused light damage, the USS Hornet was sunk because of the two torpedoes that struck the ship earlier.  Also another damaged Kate attacked and hit the USS Smith (DD-378, escorting the USS Enterprise) killing 57 men.

Note: the term "kamikaze" was not used by the main stream Japanese, instead the Japanese used "shinbu". The Japanese also referred to kamikaze attacks as "tokubetsu kogeki" and the units used to conduct these attacks as "tokubetsu kogeki tai". However, the term "kamikaze" was what the Allies called these suicide attacks and like most words that the Allies use, this was imported back into the Japanese language after WW2 and will be used here.

The following abbreviations are used thru out this review: 
  • IJN: Imperial Japanese Navy.
  • IJ: Imperial Japanese
  • JAAF: Japanese Army Air Force.
  • acft: air craft
  • CV: Fleet carrier (the biggest)
  • CVL: Light carrier
  • CL: Light Cruiser
  • DD: Destroyer
  • AF: Attack Factor
  • DF: Defense Factor
Many IJN officers were advocating the use of deliberate suicide attack by one plane with a bomb, as early as 1943.    At a Japanese military conference on Oct 19, 1944 Vice Admiral Takijiro Ohnishi, commander of the IJN First Air Fleet in the Philippines, stated that with the coming battle for the Philippines, the only way to make sure his meager force would be at maximum effectiveness in destroying the enemy, was by organizing suicide attack units composed of Zero fighters armed with 250Kg (that's 550 lb) bomb, with each plane to crash dive into an enemy carrier.

Thus the birth of the first Special Attack Force, the 201st Air Group and the official go ahead.

The Kamikaze was basically using a human as the guidance system for a missile type weapon. Something the US did not see coming or understand.  How can a culture be deliberately killing themselves to destroy an enemy like this?  Simple, it can be one of three things  - either (1)extreme patriotism [to act as the sword and shield for the Emperor against an invader was consider the supreme sacrifice and honor] or (2)brain-washed into doing this or (3)forced by threats of death to a person whose culture is not as death prone, such as the Koreans. 

The Japanese culture was taught to "hold life lighter than a feather", with suicide being an act of pride and honor, never cowardly as it is seen in western culture.  However, there are many stories that has come out over the years about 17 to 20 year olds being kicked, hit, and simply accepting this fate to stop the beatings as well as the stories at how volunteers were flocking to become kamikaze pilots. Some writers are claiming that the stories of abuse and brain-washing is just propaganda from the Allies. As time wore on, modern critics questioned the nationalist portrayal of kamikaze pilots as noble soldiers willing to sacrifice their lives for the country.

In 2006, Tsuneo Watanabe, Editor-in-Chief of the Yomiuri Shimbun, criticized Japanese nationalists' glorification of kamikaze attacks: "It's all a lie that they left filled with braveness and joy, crying, "Long live the emperor!" They were sheep at a slaughterhouse. Everybody was looking down and tottering. Some were unable to stand up and were carried and pushed into the plane by maintenance soldiers."

Also please note that not all the Kamikaze pilots  were Japanese. There were too many instances of young Korean males being forced to fly this type of a one way mission. 

My only question is how many of these brilliant young men could have come up with some type of future discovery to benefit all of mankind, if they had lived?

to the left - members of 72nd Shinbu Squadron. Three of the five are 17 years old and the other two are 18 and 19 years old. The photo was taken the day before their mission. Left to right: front row Tsutomu Hayakawa, Yukio Araki, Takamasa Senda back row Kaname Takahashi, Mitsuyoshi Takahashi.

By the time of the Battle for Okinawa April 1945, Kamikaze attacks reach it's zenith, with the attacks more effective, more ships were hit and sunk. From April 1, 1945 to Jun 22 1945, the Japanese launched over 7 major attacks with aprx 1500 various aircraft (acft) on the Allied navy (don't forget the United Kingdom was well representative in the Pacific and at this battle with the US Navy. The UK forces provided well over 25% of the entire strength with Carriers, Battleships, Cruisers, Destroyers, smaller sea craft and aircraft.).

My research has found the following for the Battle of Okinawa April 1 1945 to June 22 1945:
  • Aprx 1500 sorties - April 6 1945 to June 22 1945, both the IJN and the JAAF from Kyushu 
  • Aprx 185 individual sorties from Kyushu
  • Aprx 250 individual sorties from Formosa
  • Aprx 34 US Navy ships sunk (no capital ships sunk, a couple of CVs damaged. Mostly sunk was DD's on picket duty, and smaller ships, LST's, etc.)
  • Aprx 368 US/UK ships damaged  (this does include capital ships of UK/US)
  • Aprx 4900 US/UK fatalities (KIA or MIA)
  • Aprx 4800 US/UK wounded
It is safe to say, no one really knows the correct amount of ships, sunk or damaged, the amount of Kamikazes flown, and/or the amount of military KIA's or WIA's.

This type of attack was highly demoralizing to the US sailors and other military aboard the ships.  It was so bad, that the Navy enforced a censor to clamp down on any information getting out, both in the Navy and back home.

The U.S. Navy destroyer USS Callaghan (DD-792) in 1944-45. A Japanese plane, skimming low and undetected, crashed into Callaghan on the starboard side. It exploded and one of the aircraft's bombs penetrated the aft engine room. The destroyer flooded and the fires which ignited antiaircraft ammunition prevented nearby ships from rendering aid. Callaghan sank at 02:35, 28 July 1945, with the loss of 47 members of her crew. She was the last Allied ship sunk by a kamikaze attack during the war. 

USN Naval Guns:
The numerous 20mm Anti Aircraft guns, though effective against normal attacking aircraft, was very ineffective against the kamikazes in a dive.  The small size (weight)  and lack of kinetic energy (powder charge) from the round was not enough to destroy a diving kamikaze. Though the 40mm Bofors twin mount was very good, (which btw was replacing the 20mm guns), it too lack the ability to completely stop a diving aircraft. Both would shred parts of the aircraft, but just didn't have the mass to "stop" any of these aircraft. 
 
Against a diving kamikaze the savior was the 5"/38 gun when used in an AAA role. It literately slammed into the aircraft and stopped it dead in flight. However, it was a heavy mount and most ships from DD on down, couldn't handle the additional weight of having all the 40mm's replaced with these guns.

This is not to say that the 20mm and 40mm were not effective. Data collected by the Navy showed that 50% of the kamikaze kills were by the 40mm, 27% by the 20mm and 23% by the 5"/38 guns.. 

The photo to the right is of 2 rounds I have, a 40mm/60 training round and a 20mm spent round inside a 40mm base.  Amazing that these two different rounds inflicted as much damage as they did.  Note - the 3" and 4" were also effective, but weren't installed on many ships after 1941.

Time for ab's ratings:
•  Complexity of the game - very LOW with low medium overtones.
•  Solitaire - HIGH (a little work is needed)
•  Enjoyment Level - VERY HIGH (imho)
•  Nail biting - 8 fingers worth. One doesn't want to lose ships to this type of attack, I ruin 8 finger nails making decisions and watching the Japanese player sink and damage half of my ships (Both CVLs, 1 DD, and 1 LST)
•  Historical Level - High. This game has a solid historical reference background and a very solid OOB (Orders of Battle) with different Japanese acft and the correct USN acft - F6F Hellcats and F4U Corsairs. I lost a few of these acft too.      
•  Length of typical full game - about 30 mins to about 1.5 hours for the full campaign game.
•  Out of the 5 games played, The US won 2 of the them, while the Japanese won 3.  This should be about where Paul was aiming for in the game. aprx 50-50.  (side note: Now that I have a hundred games played, it is now a US to Japanese 65-35 win. Again, it looks like it is keeping to the percentages the designer set up.)

A good book to find:  This would be "Kamikaze: Japanese Special Attack Weapons 1944–45", a 2011 Osprey Published, New Vanguard #180, by Steven J. Zaloga and illustrated by Ian Palmer.  This is an excellent book on the history of all types of these weapons by the Japanese during the war, including of all things, "Kamikaze Tanks".
 
What I like and didn't like:

  • Like: I like the simple play and low amount of rules.  Though introductory in design, it does take more thought to play, than one would think. This is like Chess and I like Chess. Rules are very easy to learn, but requires some work to master. 
  • Like: The counters for the most part are very good. The size they are when cut from the game sheet (lack of a better term) though is 1/2" in size and a little small for me. Perfect, to fit on the game map.  The color of the aircraft, and showing an escort acft (E) and the Kamikazes (K) with those letters is great.
  • Like: Lack of a CRT is nice by handling everything thru a card draw.
  • Like: the 4 pages of history and recommendations on good books on this battle.  Having a game is fun, but it may be a battle that one doesn't have any books on. Including a short history on a particular battle is like chocolate frosting on a chocolate cake - wonderful.  [updated Jul 11, 2018 - found my notes. :P  )
  • Like: I do like having area type movement. Honestly, area movement for many games is the best.  Hexes are just, well, confining. 
  • Did Not Like: Having the US Naval ships permanently as part of the game map.  I came up with a larger game map and separate USN ships that can be placed on the new game map(s).  (see "Second thoughts" below for my fix)
I enjoy Thunder Gods. I tend to play it every few days or so, as it is one of those games where "let me try it one more time to better my score". Thank you Paul for designing and publishing this game and of course to Bruce for his graphics design. 
 
and yes, I still play this game, even today June 9, 2024.

Second thoughts:
Every game needs something "more". In this case, I found the game maps to be too little for me to see good (yeah, these old eyes are going bad).  I would love to see this game get a minor (or would this be a major?), overhaul with new larger counters, about 5/8" to 3/4" in size for the aircraft and separate ship counters 2"x 7/8" for the ships (or have the ships on cards with the boxes, but moveable.) and a new larger map. Trust me, this would be worth it for $25 - $30.  Possible the Battle of the Philippines variant too and/or some UK ships.
 
I made my own by blowing up the aircraft counters, found top down views of US CVs, CVLs,  DDs, Cargo Ships, an Oiler and LSTs and mounted them. I also redid the game map much larger, though to be honest, not in the same league of great graphics of Bruce.

End Cap:
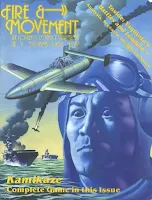
There are not very many games based on Japanese Kamikaze attacks. There is/was "Kamikaze" by Fire and Movement magazine, issue #31, published long ago in Dec 1982, good luck on finding that one without spending a fortune and of course there is the newly released, "Picket Duty" version 2, designed by Steve Dixon and published by Legion Wargames. (be sure to swing by Steve's web page for the errata)

Updated 10-03-19 to correct some thoughts, use of the English language and other small items.

This blog is considered to be a living blog. Changes will be made to it as needed to clarify, correct errors or update with new information.  And I apologize, but this review may contain references to graphics that are no longer on this blog. Long story, but it was Google who removed them.
28.5.18

Yesterday, December 7th, 1941 - a date which will live in infamy -

... the United States of America was suddenly and deliberately attacked by naval and air forces of the Empire of Japan. - FDR

A review on the game "Day of Infamy" by High Flying Dice Games.

Background on Pearl Harbor:
The attack on Pearl Harbor was planned by Admiral Yomamoto and his staff as part of a series of attacks that hit the Philippines, Wake Island, Guam, Singapore, Malaya and Hong Kong, within 8 hours of each other. Basically it was aimed at the two major naval powers Japan feared the most - the United States and Great Britain Navies. 

Historically, Japan won a major victory, in that they were able to sink the US Battleships (from the 1850' till 1990's, battleships were consider the pride of a fleet. Expensive to build, maintain, slow, and having the largest caliber of gun (between 12" to 18") these ships were the ultimate weapon at sea.).   *Remember this thought as we'll be visiting it again. 

Seven battleships (BB) were at their moorings (i.e. docked) and along with one BB converted into a training ship (USS Utah), all were hit and can be consider sunk. Only two BB's were actually sunk, the USS Arizona with 1,177 KIA and the USS Oklahoma with 429 KIA. All the other BB's was able to be re-floated, repaired and put back into service.  As were four Cruisers, four Destroyers, and 4 Auxiliary ships that were hit.

The USS Pennsylvania was actually in dry dock and was hit, but repaired and returned to service Dec 1941. The USS Tennessee and the USS Maryland were returned to service by Feb 1942.  The USS Nevada was returned to service by Oct 1942. She was hit numerous times after making a run for the ocean and was beached on purpose to keep from blocking the entrance to port.  The USS California returned to service by Jan 1944 and the USS West Virginia returned to service by July 1944.  The Oklahoma was raised and sunk on her final tow back to the mainland in 1947.  And though the USS Arizona and USS Utah were sunk, as much of their armament and equipment as possible was salvage and re-used on other naval ships.  In death as in life, these two ships carried on.

Actually Japan did us a service by this attack, as Admiral Hara Tadaichi summed up the Japanese result at the end of the battle, by saying, "We won a great tactical victory at Pearl Harbor and thereby lost the war.". And Japan did.

*Note - remember that "thought" from above? Here it is - with the Pacific Fleet of Battleships out of action while being repaired and/or replaced, the US had to relied on it's Submarine Service and Carriers. The Battles of the Coral Sea May 4-8 1942, was a strategic Allied victory and did not allow Japan to complete it's conquest of Port Moresby in southeast New Guinea or control of the Coral Sea. The Battle of Midway on June 4-7, 1942 was the turning point for Japan, as it was the most decisive naval battle in the Pacific, with Japan losing 4 carriers and the USN 1. By the end of 1943, unrestricted submarine warfare was bringing Japan to her knees, 99% of Japan's shipping was lost to Sub attacks.   By 1944, the USAAF B-29 bombing campaign of destroying Japan's ability to wage war was proving it's self.

Our carriers were being built faster than any other Nation had ever built capitol ships - fleet carriers (CV), light carriers (CVL) and escort carriers (CVE). New battleship classes, cruiser classes, destroyer classes, and a lot of other types of ships (just as important as the big boys) being built and entering into service. And let us not forget, the two a-bombs dropped on Japan - more advance technology than ever before. Men, women, and even children, the might of this nation rose to the occasion to defeat an enemy that choose to attack the US without declaring war.
Truly, Admiral Hara Tadaichi was correct. Japan poke the bear one too many times and paid for it. It was total war, pure and simple.

Note - Though I am touching on the big ships, there was 1 Navy tug sunk, 188 aircraft destroyed, 159 aircraft damage, 2,335 Military killed, 1,143 wounded, and 68 Civilians killed with 35 wounded.   

While the big ships were hit, the Japanese ignored the Naval and USAAC facilities.  A 3rd wave was planned but overturned by Vice Admiral Nagumo.  If it would have been carried out, all the port facilities, and airfields could have been so heavily damaged that it could have pushed the war in the Pacific back two to three years. 

There are hundreds of books written on the this subject.  At the end of the credits in the rules  is a listing of books about this attack that Paul recommends on this subject.

The Game:
This game is designed by Paul Rohrbaugh with graphics by Bruce Yearian. I am beginning to think of these two as "Team HFDG", lol.  And though I enjoyed all of High Flying Dice Games with the different graphic designers that Paul uses (yes, all of them), there just seems to be something that clicks between these two and one can tell in the presentation of the games.

Day of Infamy costs $7.95. No longer available. The game consists of one 8.5" x 11" map, 29 (28 double sided and 1 single-sided) unit counters, one Player Aid Card (part of the counter sheet) and a six page rules book (single sided). Plus as an added bonus, a small sheet of variants for the game.

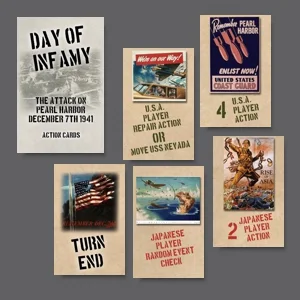
And of course, a card deck is available for purchase for $*. One can also purchase the game with the counters mounted for an additional low fee. Players will need to provide 1D6 die and a deck of cards (if the card set is not bought from HFDG)

The game map is divided into zones. I may have said this before in other game reviews, but I am liking the game map being in zones instead of hexes. With zones, it is just easier to place counters in the spaces than making sure the counters are in the exact hex.

This game packs a lot in it for it's size. There are special events that includes Doris Miller (I hope you know who he is) and Chief Finn  to  2Lt's Welch and Taylor who both almost made "ace" on this day shooting down 6 Japanese acft between them. And let us not forget the heroic effort of  the USS Nevada as in real life just like in the game making a dash for the open sea. It's little things like this that makes a game enjoyable and this one has them.

Though the game is for 2 players, the US player has very little to do and it is very easy to play the game solo.  I made a decision dice table for possibly all the decisions that the US player could make.  Whether it is any good or not is in the eye of the beholder - me.  And since it is being revised constantly, it is not available for download.

Sequence of play:
1. Preparation Phase
2. Activation Phase
3. End Phase

There are 6 turns in the game, with many steps of phases 1 to 3.  The turn ends when the Joker is drawn or if there are no Japanese air units (JAU) in play on the map. If the Joker is drawn before both players have performed an activation, it is discarded and play continues. Turns 1 to 3 is considered the 1st air wave of attack. Turns 4 to 6 is the 2nd wave of attack.  Each turn represents one group of Japanese attackers. And there is section "6.0 unit deployment" telling the player what units are in play on turn 1, turn 2, etc.

Under 1. Prep phase, the card deck is shuffled and draw cards from the deck until a red card appears.

Under 2. Activation Phase is where a card is drawn and depending on the type of card what type of activations occur. These can be one of the following:
  • movement
  • AA fire on a Japanese Air Unit
  • Enemy Acft is attack (Japanese 1st, US 2nd)
  • Japanese bomber unit attacks 
  • move the USS Nevada
Phase 3 is the end phase:
  • the turn ends when the Joker is drawn (after both players have played) or 
  • if there are no Japanese air units (JAU) in play on the map.
  • remove all Flight units (both sides) from the map.  
  • leave bomber units in place as they must move off the map
  • advance the different tracks up one level. 
  • and proceed to Prep phase.
A game can be compared to a bottle of wine. A truly fine wine can age remarkably well, taste grand to the palate 20 or more years later and become one of the classics. Games also age as well, however, less become a classic. "Day of Infamy"  is like a fine wine and imho, a classic. 

Though simple in play, it is another one of those fine games, where simple doesn't mean silly. If the Japanese player tries to attack everything, he/she will lose. One has to think in this game.

The variants for this game raise a new awareness with possibilities.  Well thought out, they do add another element to the game.   

Time to rate this game:
  1. Complexity of the game = LOW with medium overtones.
  2. Solitaire = Med HIGH (a little work is needed)
  3. Enjoyment Level = VERY HIGH (imho)
  4. Nail biting = 10 fingers worth.  I didn't know if I bit off more than I could chew as the Japanese player. (bad pun)
  5. Historical Level = High - this game has a solid historical reference background and a very solid OOB (Orders of Battle).   
  6. Length of typical full game =about 1 to 2 hours.
  7. Out of the 8 games played, it is hard for the US player to win, but it can be done, by limiting the Japanese player. Basically it is limiting the type of victory of the Japanese player. You will have to think about your plans and work with what you got.  The Japanese player will need to think just as hard, as there is no "just right, win every time" strategy plan available.  Most of my games came out as a Minor Japanese Victory, but that could be my solo tables need to be tinkered with.  And of course, using cards generates the "fog of war" and everything in between such as morale, supply, and leadership.
"Day of Infamy" covers a battle that one would think would have loads of games designed about it, but there are very few.  Unlike D-Day or Russian Front, games on Pearl Harbor are few and far in between.

Enjoy the game 
-ab

note:
This game is available once again as a bonus game when one buys Against The Odds 2019 Annual - La Vendée - 1793 directly from ATO web site.  Cost is $49.95 and includes postage.  Both the game "La Vendée - 1793" and the "Day of Infamy" are worth it.   Unfortunately, ATO publisher is not making the game available as a "black swan" for separate purchase. You either will have to do without or purchase the Annual.  😢

Updated: Jul 6th to removed last 3 paragraphs as they are no longer valid.

Updated: June 24th 2020 as this game is no longer sold by High Flying Dice Games. I am not at liberty to say who bought it, but if you have this game, then it is a collector's item.


this blog is considered to be a living blog. Changes will be made to it as needed to clarify, correct errors or update with new information. And I apologize, but this review may contain references to graphics that are no longer on this blog. Long story, but it was Google who removed them.