1.1.19

the Battle of Medjez-el-Bab, "One Helluva Fight"

Note - I rewrote the review today 24/06/2024, as it was horrible in regards to the html coding. Hopefully it still makes sense. If not, let me know!

and yes, it was... From the weather to the surprise roar of the Tiger...

The game up for review is High Flying Dice Games,"One Helluva Fight" covering the Battle of Medjez-el-Bab, 6th to 10th December, 1942,  the first major engagement fought by the Anglo-American forces in the Battle of North Africa.  Designed by Paul Rohrbaugh, with graphics by  Ilya Kudriashov. Published Nov 2018, this is one of High Flying Dice Games newest additions to a long list of the Blood and Steel series of games.

Rather than go into a great deal of history, I would like to use Paul's words in describing this battle... 

The first major engagement fought by the Anglo-American forces of the war occurred near the crossroads town of Medjez-el-Bab. A British and American battle group, named "Blade Force" and composed of units from the US First Armored and British 78th Infantry divisions, as well as some former Vichy French units,   initially took the town and then drove on to Terbourba to come within striking distance of Tunis. The Germans, however, cobbled together a battle group, centered on the newly arrived 5th Fallschirmjager Regiment (a unit initially detailed to attack Malta) and 10th Panzer Division. Supported by Luftwaffe and Italian Bersaglien units, a no-holds-barred tank and infantry fight was fought in the which the Allies were thrown back.  

The Game:

The game is based on High Flying Dice Games successful "Blood and Steel" series of games. It comes in a standard zip-lock bag with the components nicely done. For example various colors are used to delineate the various units. One has the full range of units from anti-tank to leg infantry to Tiger tanks.  Air units are represented abstractly as air support markers, as is artillery with it's own artillery support markers.  One needs to supply a container (i.e. cup) and a 1D6 (best to supply two, so both sides have a die).

The units have both an Armor Attack Factor (AF) for attacking armor type units, an Infantry Attack Factor (IF) for attacking infantry type units and a movement factor. The map is huge, being two 11"x17" sections. Printed on the two map sheets are the various tables and charts needed for play, along with the rules booklet having some of the tables and charts, too (pages 4, 8, and 9).

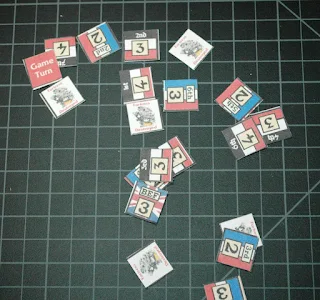
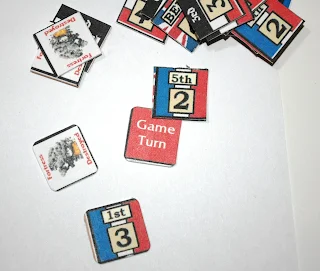
In the photo to the left one can see the game's armor counters being represented  by the French Char B, US M2 Stuart, and German Tiger with their AF/IF factors and movement. An US mechanized infantry unit, an Italian leg infantry unit and a German paratrooper unit are illustrated for the infantry.  

As mentioned before, the graphic design and colors used in the game are very well done.  A lot of companies art direction, when it comes to "sand", is that most of the time the color shade is too yellow.  Sand is anything but. When I first opened this game, it was like I went back thru time to when I was station in Saudi Arabia, during the First Gulf War. The shades of the various colors used for the map and counters was what was everywhere.  Ilya should be very proud of his work in this game.

There are several words that can and will be used interchangeably in this review of the game. For example "evening" and "night"; "markers" and "chits", etc.  


Game Components:
A nine page rule booklet (actually 8 as the 1st page is the cover), 

Two 11"x17" map sections (east and west),

Two 1/2" un-mounted single-sided counter sheets of 288 counters (actually 247 game counters) comprised of:
54 German and Italian unit counters.
63 Anglo-American (and some French) unit counters.
27 blank counters

52 hit markers.
8 arty markers.
42 disrupted markers.
24 entrenched (improved position) markers.
4 other counters (game turn, end of turn, random event, and foul weather).
14 blank counters

The counters should be mounted before cutting out for play. While you are at it, order a 2nd set of counter sheets in case you lose one or more counters. Worth it, as the extra sheet only costs a little. Note: High Flying Dice Games does offer a low cost mounting service for their games. Ask when purchasing for cost.

Where's the cards?
Ha - unlike a lot of the other HDFG, this series does not use cards. Instead "chits" are drawn!

Game Scale:
Each game turn equals 8 hours of real time with three game turns equaling a full 24 hour day. Each hex is aprx 1/2 mile across and each unit equals a company, except the Tiger 1's, which are equal to a platoon in size.

Sequence of Play:
There are three separate and distinct phases, starting with the Weather and Air support phase (5.1), the Operations Phase (5.2), and the End Phase (5.3).
 
Phase 1 - Weather and Air Support Determination (5.1 and 6.1)
Starting on turn 2, one player rolls 1D6 and consults the "Weather Determination" table on the game map to see what the weather will be like for the current turn. Turn 1, the weather is automatically "Clear". Foul Weather can have a "very" adverse effect on units (see the "Terrain Effects Chart" and "Foul Weather Effects" table on p8).

After determining the weather, both players roll 1D6 to see how many air units they will receive for that turn (6.1 to 6.1.3). Remember, no air support on night (Evening) turns. Artillery support is rolled for in Phase 2 Operations Phase, per each activation marker, each round.

Phase 2 - Operations Phase (5.2, 6.2, 7.0, 8.0 and 9.0)
Each Operation Phase in a game turn is divided into two parts (one can call them rounds or operational phases 1 and 2 or whatever. Just remember there are 2 parts to it. 

At the beginning of each round when a friendly formation "Activation Marker" (AM or chit) is selected, that player rolls 1D6 for the number of "Artillery Support" markers (or chit) they can use. (6.2.1).

Rolled for each activation marker in use. Round 1 has all the active formation activation markers that are available for use (there can be up to 4) and the "Random Event " marker placed into the opaque container for selecting.

At the end of the 1st round, "Disrupted" markers are removed from any affected units by rolling a 1D6 and consulting the "Activation Interval Disruption Removal Chart". "Hit" markers are not removed (top of p8).

Round 2 - once all the chits have been selected and acted upon for the first round, the AM chits are placed back into the opaque container with the "End Turn" chit instead of the "Random Event" chit for the second round.

Note - there are several units that are not part of a formation, these are considered independent (3.0 Game Terms And Abbreviations under "Formations").  There are no activation markers for these units. Each unit may activate once per turn (can be activated in either operational phase 1 or 2) with some restrictions in regards to stacking with friendly formations (see 8.0 Stacking). One independent unit can stack with a four unit formation stack or two units from different friendly formations plus one independent unit can stack together. No Vichy French unit can stack with any British unit (Vino and Tea wars?).

Here is a listing of the independent units:

Allies: All the Vichy French (no one trusted the Vichy, but fight they did against Germany). Vichy can stack with the Americans and the 4 "1/18 US" Infantry units.
 
Axis: All the Italian units (these were some of the best Italian units in action during WW2) and the 4 Axis Flak units.

Phase 2 Operations Phase continues...

Players take turns selecting a chit from the container.

In the first round when the "Random Events" chit is selected, continue the selection until all chits are removed from the container.

After the end of the 1st Round, roll for removal of disrupted markers from units.

Remember: for the 1st Round, each player will have two arty support die rolls. And for the 2nd Round, a possibility of 2 more for each player unless the "End Turn" chit is selected.

In the 2nd Round when the "End Turn" chit is drawn (for example, the 1st draw), the game turn is over. No more draws. It is possible that no units activate for the 2nd round.

When an active formation chit is selected there are four possible actions it can perform:

Movement Only (7.1 and 7.4.3)

  • Units may move a number of hexes up to the limit of their movement point (mp) allowance.
  • Consult the Terrain Effects Chart (p8) to see the cost of each type of terrain.
  • A unit may move 1 hex if it expends all of it's mp's.
  • A unit may be forced marched (7.1.1) 
  • Foul Weather can interfere with this action.
Close Assault Fire Combat.
  • Movement and Fire (7.2)
  • Units may moved half of their MP allowance (drop the fractions) and conduct an attack or vise-versa. NICE.
  • There are two type of units that can't perform this action (see 7.2).
  • Foul Weather can interfere with this action.
Fire Combat (7.3, 7.3.1, 7.4.2) (This is what can be considered normal combat between units.)
  • A unit has 2 different attack factors depending on what is being attacked (armor (has a picture of armor on the counter) or infantry) -
  • AF (armor attack factor) for attacking armor.
  • IF (infantry attack factor) for attacking infantry.
There are 5 possible DR modifiers that can be used. (7.3.1)

Add or subtract the die roll modifiers to the die roll. If the modified die roll is less than or equal to the firing units AF/IF, a hit is scored

1st time a unit is hit, a disrupted marker is placed on it.  2nd time a unit is hit, a hit marker is placed on it.  3rd time it is hit, the unit is eliminated.

Remember, a unit can already have a disrupted marker or a hit marker on it from a previous Operations Phase 1 or 2 or Action/attack. If the unit only has a hit marker, it has to take a disrupted marker and then another hit to be eliminated. If already disrupted, then a hit marker has to be placed and needs a 3rd successful attack on it. If the unit already has a disrupted marker and a hit marker from before that wasn't removed, it is eliminated. 
 
Whew, sorry, this is more for me anyway to make sure I got it right.

There are no ranged Attack Factors, outside of Artillery.

Terrain Effects Chart lists possible DRMs.

Improved Positions are only +1 DRM.

Close Assault Fire Combat (7.4.3).
This is an interesting and important operation. A friendly unit can enter a hex with an enemy unit. Though part of "Fire Combat", it has a lot of paragraphs describing how to do this. Just be aware it is available, gives a very tactical feel to the game and provides options for the player to explore.

Construct an Improved Position (IP) (a.k.a. "Entrenchment" counter) (7.5) 
  • IPs cannot be constructed in Towns or during Foul Weather.
  • Unit cannot move when it constructs an IP.
  • All units in a stack have to construct their own IP.
Once a unit that makes an IP moves or is eliminated, the IP marker is removed too.

Note - There are so much to these four actions, one really needs to read and pay attention to the rules. Rule sections are after the possible action. 


Also note  - This game, unlike a lot of other games, has no supply or zones of control.  Very nice.

Phase 3 - End Phase (5.3 and 10.0)
Players remove all "Disrupted" markers and roll for possible recovery (i.e. "Hit" marker removal) for units that have not moved or been fired upon that turn. (10.0). Both players calculate victory point awards that turn and adjust the VP Track on the game map. (13.0) If this is not the last turn of the game:  Advance the game turn track marker to the next turn.   Continue with Phase 1, Phase 2, and Phase 3.  That's it. 
 
The entire game as it is played. Everything is in the rules.  Not everything may be together in one place, but it is all there.  When the Playing Aid Card is called for, everything is found on either game map sheets or in the rules (p4, 8, and 9).

There is a small addendum sheet, but unlike a lot of companies, High Flying Dice Games, due to how it conducts business (printing the game when it is ordered), has the ability to fix errors in rules. For example, the missing text on the game turn track for game turn 9 was fixed by the time the 10 or 12th game went out. Errata as I have found it (there are several spots) has been fixed as of today, Jan 1, 2019.   And if you have any questions, Paul will answer any and all questions, cheerfully I will add.

Here is what Paul sent to me in case you have ordered the game before Jan 1, 2019.

One Helluva Fight
Addenda, December, 2018
Map (correction): The text describing the Allied formations is switched. The British 78th Division units are on the top, the US 1st Armored Division units are on the bottom.

Note: The first 10 or 12 copies of the game went out with the text missing on the turn 9 space (Turn 9, 8/12/1942, Evening).

Rules (clarification): The terms Evening and Night are used interchangeably throughout.

7.4.3 Close Assault Fire Combat (correction). The note at the end should read “…+1 for Improved Positions” (not +2).

Whats next, oh yeah, my options or ratings. Without further adieu...

Time for the ratings:
•  Complexity of the game: Low-medium complexity. Adding the option rules increases the complexity, but this can be a boon to even out an experienced player's ability for a new player. 
•  Solitaire: Med HIGH (as always, a little work is needed)
•  Enjoyment Level: VERY HIGH (imho)
•  Nail biting: Eight to nine fingers worth. 
• Historical Level: VERY High. This game has a solid historical reference background and a very solid OOB (Orders of Battle) and game map.  Weather rules are pretty much right on, as the weather for the battle was horrible.  Dry areas were not to be found. Mud went deep, sinking both tracked and wheeled vehicles and men.  With the Tiger tank it was basically a movable pill box with armor that stopped anything the Allies had and also outgunned  the Allies. With this unit in the game, I feel sorry for the Allies who had much to learn in regards to armor warfare and designing armor (even the Sherman was a horrible match).  If there was one country who designed a tank (almost) correctly, it was the Soviets with the T-34.   
•  Length of typical full game: About 3 to 4 hours. Remember, optional rules, longer playing time.
• Out of the games played, (no optional rules used, as this is a more complex game than what I am use too), The Axis player won 75%. The Allies were able to squeak by with only winning 25% of the games.

I know that this win ratio is lower than what Paul designs for.  It could be that I am not ready for a game of this caliber of complexity.  But it is a very interesting game.  I can't think of another North Africa game that show cases Panzer III's and IV's, Stuart's, and Lee tanks with Tigers on the prowl.  And rain, bloody, bloody rain.  

Final Thoughts
This game is different for me in that instead of using a card activation system, this game uses a chit selection for activating certain formations for moving and combat, up to twice in an Operations phase and units that can activate only once in a game turn. Using the "Close Assault Fire Combat" (7.4.3) rules for attacking, can allow over-runs with armor break-thrus.  It pays to have ready reserve units in this game for exploiting these fortunes of war.

Having the Vichy French in the game is also different from most wargames.  One of the many units that fought on the Allied side after the Torch landings was the French Foreign Legion.  
 
Following their brief existence as the "Colonial Infantry and Foreign Legion Marching Demi-Brigade" for 10 days  (Dec 5, 1942),  Général Henri Giraud on December 15, 1942 created the "3rd Foreign Marching Infantry Regiment 3e REIM", from elements of the I (battalion) / 3e REI, the III (battalion) / 3e REI, and a third mixed battalion from the 3rd Foreign Infantry Regiment, 3e REI and 2nd Foreign Infantry Regiment, 2e REI for fighting the Germans in Tunisia.

This unit proved it's self in combat, such as the destruction of the I (battalion) / 3e REIM. During combat, this regiment had the privilege of meeting the first German Tiger tanks and endured the loss of 35 officers and 1634 legionnaires. They gave their all during the Battle for Tunisia. What is very interesting is that this unit could trace it's history, not only back thru WW1, but all the way to receiving battle honors from "Camerone" Mexico, April 1863.

What gets me is how Paul thinks out and designs interesting features of in a game, such as the way he treats the Tiger tank. Not only can you use it as a combat unit, but you can apply a Tiger unit as a support unit for a die roll modifier (-1) to apply to another units attack.  Having both the AF (armor) attack factor and the IF (infantry) attack factor shows the two different types of ammo units had to be concern with.  It's the little things like this that can make or break a game, especially if the ideas are half thought-out.  One thing I can say is Paul never half-thinks a game out.  

I also believe that Paul out did himself this time with this game, possibly bringing the "Blood and Steel" series to it's pinnacle.  One needs to go back to see how many different games that Paul has designed in this series and judge for themselves. 

Here are other titles that are available in this series from High Flying Dice Games:
*A Test of Mettle: The Battles of Arracourt, Dompaire and Mairy, September 1944 (Professional).
*Black Lion’s Roar: The Battle of Catigny, May 27-31, 1918
*Blood, Steel and Sand: The Battle of First Alamein, June 1942
*But Not In Vain: The Battle for Calais, May 1940
Hot Blood, Cold Steel: The Battle of Chawinda, September 15-16, 1965
*Kings of the Hills: The Battle of Kap-Yong, April 1951
*L’Audace: The Battle of Abbeville, May 1940
Lightning and Steel: The Battle of Piotrków Trybunalski, September 1939
*One Helluva Fight: The Battle of Medjez-el-Bab, 1942(newest)
Slim to None: The Battle of Slim River, January 7, 1942
(*note- these I have bought :) )

In the Works:
Hell in the Holy Land: The First and Second Battles of Gaza, 1917
A Long, Hard Road: The Battle of Dubno, 1941
Kings of the Castle: The Battle of Imjin River, 1951
There is one more, but I am not privileged to mention it.

Each game in the Blood and Steel series is well researched and documented. Games are low to moderate in complexity with many optional rules that will increase the complexity for those so incline (yeah, you know who are, lol).  One to two game maps, with counters ranging from 80 to over 200 and rules that are usually 6 to 10 pages in length.   Movement is handled via activation markers (chit pull) instead of cards.

This series of games have been well-received in the gaming community thru-out the years, (Paul was telling me that his YSU students help play test this system starting in 1997).  The first game, "the Battle of Prokorovkha", was published in 2000 by Microgame Design Group.  
 
This game and two more were picked up by L2 Design Group in 2006. All are still available from L2 Designs and published as: 
Blood and Steel: Kursk, the Battle of Prokhorovka
Blood and Steel Expansion: The Battles of Oboyan Hills and Rzhavets
Blood and Steel: The Battle of Ponryi

*note - I am not sure if L2 Designs is still in business.  I don't even have a contact email or number for them anymore. Maybe Noble Knights may have some of their games?  If they are, please do grab the above 3 games. If not, I wish everyone connected with L2 the best and speedy recovery (that's you Lembit).

The bibliography Paul included is very good, honestly, one could not ask for a better selection.  Out of the three references, I would recommend, if you have the resources to purchase,  Rick Atkinson's An Army at Dawn: The War in North Africa, 1942-1943 (his entire series on the US in WW2 is well worth the cost, too).

One of my favorite WW2 propaganda movies is "Sahara", made in 1943. It concerns a M3 Lee tank and crew who are skedaddling from the fall of El Alamein (first battle). The problem is there was no American M3 Lee crews at this battle, but with the Torch landings and some of the nastiest losses inflicted on the US when this movie was made (Battle of Medjez-el-Bab, Kasserine Pass, etc.), that for probably morale value, this movie was changed from Tunisia to Egypt.   Of course I could be pulling all this from my butt, but it makes sense on the mix-up story line.

The question that begs to be ask, "is there life left in this series"?  After 19+ years, if this particular game is any indication, there certainly is.  Well worth buying and the time needed to mount/cut out the counters.  I can't wait for his next games to come out.

It would be something to see a few other battles done in this series, such as around the Dunkirk area, such as the battle of Wytschaeteor, or maybe Operation Dragoon, the Dieppe Raid area (note - got my wish on this one!) or even individual battles from 1812 such as the Battle of New Orleans with pirate Jean Laffite and Choctaw warriors, oh boy (yeah some of those northeastern battles attacking Canada or the burning of Washington D.C. would be ok, if they really are needed... lol).

Well, that's it for now. Thank you for dropping by.   

-ab


This blog is considered to be a living blog. Changes will be made to it as needed to clarify, correct errors or update with new information.
And I apologize, but this review may contain references to graphics that are no longer on this blog. Long story, but it was Google who removed them.

5.12.18

The Union Forever


I generally don't play American Civil War (ACW) games, but sometimes along comes a little game and though the era doesn't grab me by the ears, I have to put aside my dislikes, really look at it, read the rules, and play it a few times.

In this case, it is an ACW era game called "The Union Forever", which is pocket battle game #11. Design by Paul Rohrbaugh with artwork by Luke T. Moore and copyright © 2012 by LPS, Inc, second reprint. (LPS, Inc is known by several other names, such as Against The Odds magazine, Turning Point Simulations and Last Stand Games)

I'll be honest, I am not sure why I picked it up, or read the rules or studied the artwork (ok, it's a graphic design, but truly awesome map art). The more I read the rules, the more impressed I became, that here is another version of Paul's unique card driven combat system, different enough from his other games, that I had to play it. I was not disappointed.

Please do note, I am not going to go into all of the rules. I will hit the main ones and generally describe the rest.  This does two fold purpose - 1) it doesn't present all the rules to be copied and 2)  hopefully will get your interest up enough to request this  pocket game the next time you purchase something from LPS, Inc and I believe High Flying Dice Games has a limited supply too.

"WUT, no history???"
That's right, not going to go into a lot of the history on this game or the ACW, as every one has anywhere between 3 or more books on the subject. With that in mind, on to the game...

The Game:
"The Union Forever" is a grand strategic treatment of the American Civil War. It is presented in the pocket game style (i.e. post card size) format of a whopping 4" by 6" in size. That's it. The game map is printed on the front, the rules are on the back and the counters run along the edge, waiting to be cut out. With the Union in blue and the boys of the South in Butternut brown.

Note: Butternut is a somewhat light brown/tan color. It was made from nut shells (walnut to pecan), acorns, and lye. I have heard and read of rusty iron nails being thrown into the mixture, along with bark, roots, branches, leaves, etc. Different qualities and quantities of materials in the making of the dye solution, along with normal fading of the material, would lead to the various shades of butternut.

The game map is very interesting. It shows the majority of the CSA states, missing Texas, but that's AOK as the pocket game would need to be re-formatted to about 5"x16" in size to show Texas correctly (yes, Texas is BIG, at least another 10" in this scale to truly display the state correctly. I am a Texan, I know these things :D ).

The game map is well designed, with each of the states further divided into 2 areas along with several mountain ranges that block movement. On the lower right of the game map, Charleston Harbor is present, representing the naval blockade of the CSA, and is labeled "The Anaconda Plan".

Yup, looking closely, one can even see McCrady's restaurant, yeah, see that little bright dot over yonder. George Washington actually ate there. Each of the armies have their setup indicated on the game map.

On the right side of the game map, there are 14 counters, six double-sided counters representing the Union (the Union counters have a combat factor (CF) and six counters for the CSA (note that only three CSA Army counters are double sided and use the CRL for their CF). The flip side is a reduce state for the Union and a "-1" to the CRL for the South. CSA Militia (CM) have no flip-side and are eliminated when called for a flipping. The counters are very well design too.   I would like to mention at this point that there is no mistake for both the Cumberland Army and the Mississippi Armies of the North. Yes, those reduced (flip side) numbers are correct.  

There are two additional markers. One is called "The Anaconda Plan," which goes on it's square. The flip side of it is "Blockade Broken". And of course, the "CRL" marker used for tracking the progression of "Confederate Resistance Level" (CRL) thru-out the game. No game turn counter is provided, as one is told in the rules to use a penny as a turn marker.

Record Track:
The record track along the bottom edge of the game map serves a dual purpose, both as Game Turn (GT) record keeping and the Confederate Resistance Level (CRL) progression tracking. Each game turn is divided into 6 month periods of time with Summer/Fall and Winter/Spring, starting of course, with Summer/Fall 1861. The GT starts on the "1" space.

The Confederate Resistance Level (CRL), shows the attack/defense number for the CSA Armies for that turn and starts on GT8 with a CRL 4. The CRL marker can go down (to the left) or up (to the right) depending on Rebel Invasions, Anaconda Plan/Blockade Broken and carpetbagging, oops, I mean Union Pacification.

Notice that the first square on the Record Track is labeled as  "C.S.A. Surrenders" with a CRL of 0. If the CRL marker gets to that space anytime, the game is over, the South loses.

There is a  tenth square on the Record Track (GT 9), if the game does go past GT 8 and there is at least a CRL of 1, the C.S.A wins. No Spanish-American War, no WW1 as we know it and certainly, there would not have been a WW2, but probably a series of regional wars thru-out the world.

The CRL is the heart and soul of the game for the CSA player. As such, it is pure genius, as far as I am concern. Paul coming up with such a simple system to show the deterioration of the CSA armies over the long haul of the war without the use of extensive complicated rules is simply amazing.

Setup:
The players do need to provide the following: a 1D6, though to be honest both players need 1D6 as passing the die back and forth gets old, FAST! A deck of regular playing cards and 16 pennies. These pennies are used in-addition to the game turn marker, as territory markers to show what areas the Union controls.

In the game it is called "Pacification" when the Union controls an area, though I tend to think of it as "Yankee Carpet Bagging". One is reminded to please use the Lincoln head up on the penny. Paul does have a wicked sense of humor at times, lol.

The card deck is prepared for the game by removing all the Kings, one Joker, and all of the six to ten cards. The cards left for use are the Ace to Five cards, the 8 face cards - four Jacks, the four Queens and one Joker. This will make a deck of 29 cards for this game. Shuffle the hell out of that deck, make sure there are red cards, as you know how sneaky them Yankee devils can be and place the deck of cards where each player can access it.

At this point, I went to look on High Flying Dice Games, LLC web site and look what I found - yes, a card set for "The Union Forever". Cost is very reasonable at $*. Best bet is to buy 4 games and get this card set for free. That way shipping won't eat you alive.

The three starting Union Armies are placed on the starting area, off the map, that blue belly blue edge on the northern edge, and a penny is placed (Lincoln head up, please) in the NW portion of Virginia as it was pacified by the Union (this being West Virginia) at the start. The CSA player places his three starting Armies on their start areas. The three State Militia (CM) counters, can go anywhere, except Ky and Mo. The three extra Union Armies are reinforcements coming into play on turns 2, 3, and 4.

A turn is comprised of several rounds of drawing a card and ending the turn when the Joker is drawn or all the cards have been played (yes, in case the Joker card as the first or second card drawn, discard the Joker as both players need to have performed at least one ACT and re-draw a card). Play will continue at this point and the current game turn will end when all the cards are drawn .

Activations:
ACTs, are used by the players to move units and have combat. Each player alternates performing a card draw from the deck:

If the card is red, the Confederate player is allowed an activation (ACT) and If the card is black, the Union player an activation (ACT).

If the card is odd (Ace, three, five), one Act is allowed.
If the card is even (two or four), then two Acts are allowed for that side.
 
Please note a single unit can not perform two acts in a round from an even card draw, such as move then attack. It can do this under the special activation of a face card.

Face cards are considered to be a "Special Activation"  by allowing the following:
(a) Attempt to remove (CSA) or restore (Union) the Anaconda Plan or
(b) Perform two acts (in this case the same unit may be selected for each act) or
(c) Restore a weaken unit to full strength (flip it back) or
(d) Return an eliminated unit to play at full strength.

Movement:
Movement is very simple - an ACT allows a unit to move into an adjacent area.  Areas are denoted by solid lines for state borders or dashed lines dividing up a state into smaller areas. Units cannot move thru the mountain borders. There are no stacking limitations.

There are certain restrictions for movement, such as CSA Army units can only enter those areas labeled with that Army's designation, Union Armies cannot leave an area until it has been carpet bagged (i.e. in game speak "Pacified", come under Union control) unless the unit is moving off the map to the North. Off map movement is not allowed in any other direction.

Combat:
An Act allows one friendly unit to attack all of the enemy unit(s) in the same area. The active player declares the attacking unit and must target all the enemy units in that area. Both sides will roll 1D6 each and add the following to the die roll:
(a) + the printed CF for the Union, full strength or weaken.
(b) + for CSA full strength or -1 if weaken to the CRL.
(c) +1 for a CM unit (may defend only).

Combat Results:
Please see the Combat Results section of the rules. The final outcome can be 1) attacker retreats, 2) no result, 3) defender loses a step, 4) defender retreats or 5) defender loses step and has to retreat.

Pacification:
An ACT allows the Union to attack an empty uncontrolled area in order to pacify it (bring the area under Union Control).  Again, both sides will roll a 1D6, with adds to both die rolls. If the Union result is greater, then the area is pacified and has train loads of carpet baggers swarming all over, lying and cheating the good people out of their land and their Grandma's blankets.

Area Control Effects:
The CSA can never regain control of an area the Union has pacified and this also affects the CLR track.

Anaconda Plan & Rebel Invasions:
Again here is where some incredible thinking has gone into this game to simplify blockades and CSA invasions of the North but to show the effects of having or not having blockades can do as well as Invasions of the homelands of the Northern Aggressors.  Very impressive.

End of Turn:
When the Joker is turned over or last card is drawn, the game turn is over. Shuffle the cards again. The CRL is moved 1 space to the left if the Anaconda Plan is still in effect (i.e. not blockade broken).

Winning the Game: 
The Union wins the game by reducing the CRL to "0" by the end of any turn, but not later than GT 8. If by the end of GT 8 the South still has a CRL of 1 or more, the South wins.  

Well, that's it for what the game is. Now it's time to talk about it.

Time for the buns ratings:
•  Complexity of the game = LOW
•  Solitaire = MED
•  Enjoyment Level = HIGH (imho). If you know me, you know I like these little games. Each doesn't take all week to play or a master's degree to figure out how to play.
•  Nail biting = 8 fingers worth. Will the die rolled the way you want or not, will you sack the die like Lincoln did to the Union Generals, for other dice in your collection?
•  Historical Level = It's good.  It's grand strategic in scope. You have some state militia and some armies. Can't find fault with the history.
•  Length of typical full game = about 1 to 2 hours.
•  Out of the 6 games played = the South was full of carpet baggers by turns 6, 7, or 8. I lost 5 games, but then the fickle finger of fate smile once upon the South and "Dixie" became the new National Anthem. The Yellow Rose of Texas almost made it, but now we know why Texas wasn't included on the map.

After Thoughts: 
During the writing of this review, I interspersed my thoughts in with the rules.  Pocket games are hard to design with having to pack "fun" and history into such a small format. A game needs to be both historic accurate and very fun to play to bring people back to play it often or request it when buying other merchandise. 

Making a game on the entire American Civil War and including such things as Lee invading the North, Blockades, the effect of support and supply on an entire national level of the C.S.A that affected morale, troops, ammunition, etc, with such simple rules, makes this game to me, an outstanding success. It may not be one I will play all the time (not having Texicans whipping on dem Yankees, is a bit of a let down to me), it does raise the bar in game design of small games on an entire war.  It is different (and more difficult) to do this type of pocket game versus say a specific battle like The Bulge (and Paul used 4 pocket games to game that one) and succeed, as I believe he has with this game.

And yes, as mentioned above, the flip side is correct for Union Armies Mississippi 4/3 and Cumberland 5/2. I checked with Paul and he ensured me that those counters are correct. 

What I would like to see in the pocket game format from Paul is the Revolutionary War and the War of 1812.  Now those would be some pocket games! 

Sure, there are other ACW games out there, but not at this scale, compactness, and need I mention "fun"?  Nah Suh, I didn't think so.   
 
Thanks for reading
-ab


This blog is considered to be a living blog. Changes will be made to it as needed to clarify, correct errors or update with new information.
And I apologize, but this review may contain references to graphics that are no longer on this blog. Long story, but it was Google who removed them.


1.11.18

Bitter Heights, Battle of Mitla Pass, 29-31 Oct, 1956

a very simple explanation of a very complicated war "The Sinai Campaign, 1956"...

Sept 1955...
President Nasser in September 1955, in violation of international agreements and in what amounted to an act of war, sealed off access to the Israeli port of Eilat, effectively stopping Israel's sea trade with much of Africa and the Far East. Also, Nasser had set up and was aiding his terrorist funded "Palestinian fedayeen" organization that was used to conduct terror raids on Israel from the Sinai.  

On 26 July 1956, Nasser announced Egypt’s nationalization of the Suez canal, most of whose shares were held by Britain and France. With no help from the U.N. regarding the fedayeen terrorists, the closed shipping, and diplomacy failing to reverse Nasser's decision concerning the Suez canal, Israel, along with Britain and France, embarked on preparations to stop the terrorists, open shipping, and regain control of the Suez canal.

The conflict...
29 October 1956, Israel invaded the Egyptian Sinai with a para-drop on Mitla Pass, along with attacks along the Israeli-Sinai border. Britain and France issued a joint ultimatum for a cease fire, which was ignored by both sides. All was going accordingly to plan for the 3 allies. On 5 November 1956, Britain and France landed paratroopers along the Suez Canal. The Egyptian forces were defeated, but they block the canal to all shipping by sinking 40 ships along the canal (the Suez Canal was closed from October 1956 until March 1957 when the last of the shipwrecks were cleared.). 

Heavy political pressure from the United States and the USSR led to a withdrawal by all 3 allies. U.S. President Dwight D. Eisenhower had strongly warned Britain not to invade; he threatened serious damage to the British financial system by selling the US government's pound sterling bonds. Historians conclude this crisis "signified the end of Great Britain's role as one of the world's major powers". I guess they didn't wear "I like Ike" buttons. 

Note: Eisenhower years later admitted that not supporting Eden over Suez had been his greatest foreign policy mistake.

Aftermath...
As a result of this conflict, the United Nations created the UNEF Peacekeepers to police the Egyptian–Israeli border, with 3,300 United Nations troops. 

Israel fulfilled some of its objectives, such as attaining freedom of navigation through the Straits of Tiran, which Egypt had blocked to Israeli shipping since 1950 and at least 10 years of freedom from terrorists, while Britain and France did not fullfill their objectives (regaining the Suez) with British Prime Minister Anthony Eden resigning and France remembered this embarrassment from the US years later. Canadian Minister of External Affairs Lester Pearson won the Nobel Peace Prize and the Soviet Union was able to invade Hungary without worry from the UN or the US. Nasser came out of this in a very favorable political light, having secured a new level of prestige among Arab peoples as a leader who had defied European empires and survived a military invasion by Israel.

What and where is Mitla Pass?
Mitla Pass is a 480 meter-high, 32 km-long snaky pass in the Sinai of Egypt, wedged between mountain ranges to the north and south, located about 50 km east of Suez and has been the site of numerous battles thru out the ages. During the Sinai Campaign of 1956, many have said that the battle for Mitla Pass was unnecessary, that it was a political objective and not a tactical or strategic objective. However, it is a natural bottleneck on two of the three major east-west highways crisscrossing the Sinai Peninsula.

The beginning...
At 17:00 on 29 October 1956, Israeli units parachuted into the eastern approaches of the Mitla Pass at the start of the Sinai Campaign 1956. There were only enough C-47 Dakota transport aircraft in the Israeli Air Force to drop the bulk of one parachute battalion, 395 men in all, east of the pass. 

Given the high state of readiness the paratroopers of the 1st Battalion, 202nd Brigade had achieved, not to mention their proven combat prowess, a battalion was thought to be sufficient to achieve the straightforward goal of creating a diversion in the rear of the Egyptian forces in Sinai. 

To ease the isolation of this small force, the rest of the parachute brigade was to rush overland to Mitla Pass by way of the southern road, from Kuntilla via Themed and Nakhle. If successful, the paratroop battalion—and later the entire brigade—would be in position to block an important Egyptian line of reinforcement and retreat.

Due to a navigation error, the C-47's landed Eitan's 395 paratroopers three miles away from Parker's Memorial, their intended target. Eitan marched his men towards Jebel Heitan, where they dug in while receiving supplies of weapons dropped by French aircraft. At the same time, Aluf-Mishne (Colonel) Sharon's 202nd Paratroop Brigade raced out towards the Mitla Pass.

As the paratroopers were being dropped into the Sinai, the Israeli 9th Infantry Brigade captured Ras al-Naqb, an important staging ground for that brigade's later attack against Sharm el-Sheikh. Instead of attacking the town by a frontal attack, they enveloped the town in a night attack, and negotiated their way through some of the natural choke points into the rear of the town, surprising the Egyptians before they could ready themselves to defend. The Egyptians surrendered, with no Israeli casualties sustained.

The 4th Infantry Brigade, under the command of Colonel Josef Harpaz, captured al-Qusaymah, which would be used as a jumping off point for the assault against Abu Uwayulah. Colonel Harpaz out-flanked al-Qusaymah with two pincers from the south-east and north-east in a night attack. In a short battle lasting from 3:00 am to sunrise, the IDF stormed al-Qusaymah. 

The portion of the paratroopers under Aluf-Mishne (Colonel) Sharon's command continued to advance to meet with the 1st Brigade. En route, Sharon assaulted Themed in a dawn attack, and was able to storm the town with his armor through the Themed Gap. Sharon routed the Sudanese police company, and captured the settlement. On his way to the Nakla, Sharon's men came under attack from Egyptian MIG-15s. On the 30th, Sharon linked up with Eytan near Nakla.

The Battle for Mitla Pass...
Dayan had no more plans for further advances beyond the passes, but Sharon decided to attack the Egyptian positions at Jebel Heitan. Sharon sent his lightly armed paratroopers against dug-in Egyptians supported by aircraft, tanks and heavy artillery. Sharon's actions were in response to reports of the arrival of the 1st and 2nd Brigades of the 4th Egyptian Armored Division in the area, which Sharon believed would annihilate his forces if he did not seize the high ground. Sharon sent two infantry companies, a mortar battery and some AMX-13 tanks under the command of Mordechai Gur into the Heitan Defile on the afternoon of 31 October 1956.

The Egyptian forces occupied strong defensive positions and brought down heavy anti-tank, mortar and machine gun fire on the IDF force. Gur's men were forced to retreat into the "Saucer", where they were surrounded and came under heavy fire. Hearing of this, Sharon sent in another task force while Gur's men used the cover of night to scale the walls of the Heitan Defile. During the ensuing action, the Egyptians were defeated and forced to retreat. A total of 260 Egyptian and 38 Israeli soldiers were killed in the battle.

Although the battle was an Israeli victory, the casualties sustained would forever haunt Sharon.  In particular, Sharon was criticized for ordering the attack on Jebel Heitan without authorization, and not realizing that with the Israeli Air Force controlling the skies, his men were in not such danger from the Egyptian tanks as he believed. While Dayan himself maintained that Sharon was correct to order the attack without orders, and that under the circumstances, Sharon made the right decision; he criticized Sharon for his tactics of attacking the Egyptians head-on, which Dayan claimed led to unnecessary casualties.

The game...
Bitter Heights, The Battle of Mitla Pass, October 29-31 Oct, 1956 is another game from High Flying Dice Games, designed by Paul Rohrbaugh with graphics by Bruce Yearian. Published in 2012 and is up for review.  

1.0 Game components consist of  the following:
  • a 11"x17" game map
  • 90 double sided counters (unmounted)
  • one 8.5"x11" player's aid card
  • and a set of rules that are 4 pages in length
The game does require a little work to get it ready for play (just mounting and cutting out the counters). It's cost is very reasonable at $11.95 plus shipping. This is a lot of bang for the buck in this inexpensive game.  

The origins for Bitter Heights comes from Paul's design of Operation Kadesh game (the 1956 Sinai Campaign still  available from High Flying Dice Games, along with the game's card set).  One thing about High Flying Dice Games is the artwork is impeccable, the rules are all there, and very inexpensive. To get the best value, order 3 or 4 games (they would set you back far less than say one game from any other company) for the same price of mailing. Check High Flying Dice Games web site for other games. 

The players will need to furnish one D6, a deck of cards, in addition to mounting and cutting out the counters, as mentioned before. Also available is mounting of the counters for a small additional cost.

Of course a card set is available for this game  for an additional amount. (note - if you order four or more games at the same time, you can choose this card set for free.).

Otherwise, a regular card deck is used. Remove all the 6 to 10 cards (6, 7, 8. 9, 10) from the card deck, make sure there are two jokers, and  shuffle, shuffle shuffle. Draw one card - on a red card draw, the Egyptian player plays and on a black card draw, the Israeli plays. 

The game, depending on the scenario selected (section 7.0) can have up to 20 turns with many rounds, which actually makes for a long game.

Game Errata:
There is a small slip of paper dated Sept 2012 for 2 important pieces of game errata, oops, excuse me, I mean game addenda. (I have not found any other EXCEPT one)
    • PAC (Player's Aid Card) Interdiction (correction): A unit firing out of an interdicted area has a -1 DRM (not +1 DRM).  The rule 4.3.1 is correct.
    • 4.2 Combat Resolution (correction): An attack succeeds with a modified DR of 4 or more. It is ineffective with a modified DR of 3 or less.
    •  Other errata I have spotted:
      • there is on page 2, under 5.0 Rally, at the end of the 2nd sentence a "(?)". Mark it out if you want too (I used white out). 
If you find something is not "just right" and/or you have a question when you start to play, read the rules again and go by what the rules say. I have found that everything, even if it isn't in a section of the rules where one would think it should be, is always in the rules.   And of course, Paul will answer questions on any of his games. Cheerfully I add. 

2.0 Sequence of Play:
Sequence of play is one of the easiest I have seen.  Five steps is all there is, with two steps, one preformed at the beginning of the game turn and one performed at the ending of a game turn with the drawing of the second joker. Otherwise per round there are only three steps used.
  • 2.1 Air Determination Phase: (performed only at the beginning of a turn). Both players roll a die for air support. Highest die roll wins, with the winner getting a number of air strikes equal to the difference between the 2 die rolls. (example - Egyptian rolls a "1", while the Israeli rolls a "6".  The Israeli player receives 5 air strike markers to be used for the game turn (not per round). Also, each side, depending on the game turn track, will receive a +1 to their die roll (Israeli gets +1 from Game Turns 3 to 10, while the Egyptian gets a +1 from Game Turn 13 to 20.). Rolls that are tied, result in neither player receiving any air support. The max amount of air strikes is 5 for the Israeli player and 6 for the Egyptian. 

  • 2.2.1 Card Draw: A card is drawn and whether it is red or black, determines who plays that round.
    • Red for Egyptian, Black for Israeli. 
    • an odd number card gives 1 activation,  
    • an even number card gives 2 activations,  
    • and a face card gives 3 activations, or  
    • the player may elect to pass on the card draw. 
    • The first time a joker is drawn, roll 1D6 twice consulting the "Random Events Chart" to see which, if, a random event occurs.  
    • The second time a joker is played, the game turn is immediately over, and section 2.3 is followed. 

  • 2.2.2 Activation: The winner of the card draw can choose one of the four types of activations each round. The following can be performed - 
    • move a unit up to it's movement allowance (section 3.0 - 3.1 and 3.2), 
    • hold position (not move) and attack (section 4.0 - 4.1, 4.2), 
    • attempt to rally a disrupted unit (section 5.0), and/or 
    • performed an air strike (both players can do this) or artillery strike (Israeli player only) (section 4.3 and 4.3.1) or 
    • elect to pass any or all of their activations.

  • 2.2.3 End of Activation Cycle:
    • If the 2nd joker wasn't drawn, then return to section 2.2.1 - Card Draw to continue on the next round. 
    •  If the 2nd joker was drawn, proceed to 2.3 End Phase.
  • 2.3 End Phase: If the second Joker was drawn, the game turn ends and players do the following  -
    • If the turn marker is on the last game turn, game ends and the victor is determine. 
    • If the turn marker is not on the last space, advance the turn marker one space and:
      • Remove all interdiction Air Strike markers from the map.
      • Reshuffle the card deck.
      • Continue with the game starting with 2.1 Air Determination Phase. 
3.0 Movement:
Units can move from one contiguous area to another. Units can move into an area with an enemy unit(s), but not out of or thru an area, if the enemy isn't disrupted (has a "D" counter on it).

Roads: (section 3.1)
If both areas are connected by a road, then units can move up to two areas.

Elevations: (section 3.1)
Elevations are represented by the various shades of white for level 1 to 2 and browns from 3 to 4.  Only area ids 1, 2, and 3 are level 1 (each little area has a round circle that shows the area id and a factor modifier.). The rest are level 2, level 3 and level 4. If an area has any level 4 in it, then it is consider to be level 4 (only areas 13, 19,24, and 31 are level 4)    
  • Each type of terrain affects units and movement:
    • Level 1 and Level 2 - all units may enter and move.
    • Level 3: No Armor or Half Track units allowed to enter, all others can enter and move into.
    • Level 4: No Armor, Half Tracks or Heavy Weapon units allowed to enter, all others can enter and move into.
  • Each area has an area id number in black and a combat DR terrain modifier from 0, -1, and -2 in red.
  • Terrain affects the combat DR modifier.
Stacking:(section 3.2)
Either up to five friendly units or all units of the same battalion plus 3 armor units can occupy an area.  Half Tracks when paired up with their parachute infantry do not count towards the stacking limitations.

Game Scale and LOS:
I love this game map, NO HEXES. It uses area movement with beautiful various shades of brown. Even with the red used, I can see most everything. Bruce really outdid himself back in 2012 on this one.

Scale of the game map is 1 inch equal to 2 miles.   Also, there are small dots in each center of each area that one uses to trace LOS (these are not black, but a darker shade of the gray-brown color used to show level 4 terrain. I colored in those dots with black ink to make the dots stand out better.). 

4.0 Combat: (sections 4.0, 4.1, 4.2, 4.3, 4.3.1)
All undisrupted infantry, heavy weapons, parachute, and armor can attack enemy units up to two area away. Arty units can attack up to 3 areas away.

Units:
I also like the graphics used on the counters and the different sides coloring. No fancy graphics, but good gaming graphics, easy to see and understand. Yes, they may be considered old school, but sure beat the crap we see now these days.

Each of the various counters have the standard unit size, ID, and type, with both a normal and a reduced side, with disruption being a counter with a "D" on it. The combat factors listed is for attack and defense, as movement is standard for all (1 area at a time, unless using the road).  Disrupted units cannot move or attack. Remember, if a unit is disrupted and takes a loss (flipped to reduce status) it is still disrupted until rallied.
    • All non disrupted units, have a 2 area range for combat, except Artillery which has a range of 3.
    • All ranged artillery (arty) counters have a small circle in the upper right (the number is in red and is the units range for attacking enemy units).
    • Disrupted units cannot attack or move.  
    • Units can attack one enemy unit provided it is in the attacking unit LOS (i.e. no higher level of elevation between the two units). 
    • Artillery does not require an LOS to the target as long as another friendly unit can trace a LOS to the unit being attacked.

6.0 Special Units: 
The game has a few special units in the game  consisting of Half Tracks (section 6.1) (Israeli player only), for movement of Israeli paratroopers, artillery units (section 6.2, both players,) and entrenchments (Egyptian player only) (section 6.3). Be sure to read the rules on Half Tracks.

There are two counters, I would like to make special mention of.  One is the counter used for the Israeli off board artillery marker (under section 4.3).  It doesn't look like any type of an off board counter, and is not marked as so, but this is it.  :D   It enters play with the arrival of the Israeli 771st Battalion. 

And the other, to be honest, I haven't figure it out.  This being the Israeli "Enhance Air Support Marker".  If any of you fine folks have found where this is located in the rules, please let me know and thanks in advance.

7.0 Game length and setup: 
There are 3 scenarios with various variants for each.  These are "Snake Bit" (section 7.1), "Viper's Den" (section 7.2), and the full campaign "Snake's Lair" (section 7.2.5), the longest at a whopping 20 turns).

Time for the buns ratings:
    • Complexity of the game = I found it to be low-intermediate level
    • Solitaire = Medium to high (a little bit of work is needed)
    • Enjoyment Level = High (imho)
    • Nail Biting = 8 fingers worth. It can go down to the last play of the game.  
    • Historical Level = Very High - this game has a very solid historical reference background and a very solid OOB (Orders of Battle).   
    • Length of typical full game = About 2 hours for the smaller scenarios and with the full campaign game, 3 or more hours.
Bibliographies:
An extensive bibliography is included, however, I would like to add a few that are not mention, but do qualify. (note: These may be hard to find)
    • Bregman, Ahron - Israel's Wars: A History Since 1947. London: Routledge. ISBN 0-415-28716-2.
    • Bromberger, Merry and Serge - Secrets of Suez Sidgwick & Jackson London 1957 (translated from French Les Secrets de l'Expedition d'Egypte by James Cameron)
    • Dayan, M. - Diary Of The Sinai Campaign. New York, Harper & Row 1966
    • Herzog, C. - The Arab-Israeli wars: War and peace in the Middle East. NY: Random House. 1982
    • Katz, S. M. - Arab Armies of the Middle East Wars 2. Men-at-Arms Series, 194. Oxford, UK: Osprey. 1988
    • Laffin, J. - Arab Armies of the Middle East Wars 1948-73. Men-at-Arms Series, 128. Oxford, UK: Osprey. 1982
    • Marshall, S.L.A - Sinai Victory : Command Decisions In History's Shortest War, Israel's Hundred-Hour Conquest of Egypt East of Suez, Autumn, 1956. New York: Battery Press. ISBN 0-89839-085-0. 1958
    • Zaloga, S. -  Armor of the Middle East Wars 1948-78. Vanguard Series 19. London: Osprey. 1981
Second Thoughts:
How does the game play?  Good question. With simple rules and low counters It is actually a low-intermediate complexity game, not introductory. Depending on the scenario selected and variant played, both players have a limited amount of resources, requirements to capture certain areas and for both players, to hold down the amount of units either lost or disrupted to win is not as simple as it sounds.   

Paul in his designer notes states that the Israeli player will feel a lot of pressure thru-out the game. This is very true. He also states that the Egyptian player can't just sit there and expect to win. True again. They have to inflict as much losses as possible to the Israeli player to even have a chance to win (not just garner a tie-game).  

I was able to play the game solo with a just little work. Two player is the way to go for this one, though. Unfortunately, my gaming partner doesn't like the card draw system. I do, IMHO, it simulates the fog of battle very well, much better than the archaic u-go, i-go system of play. I like it so well, I use it even in games that don't have it (modifying that gaming system of course). 

Out of the five 2-player games played, the game was enjoyable, gaming partner was a pain in the butt, as he won all 5. The 5 solo games were enjoyable, too, just having a live opponent made me think harder. 

But the question remains, will one return to this game to play it again?  I would say yes. With area movement, armor, arty, infantry in several flavors,  low counters, and a hellacious card system for combat and movement, what more could one want?

-ab


This blog is considered to be a living blog. Changes will be made to it as needed to clarify, correct errors or update with new information. 
And I apologize, but this review may contain references to graphics that are no longer on this blog. Long story, but it was Google who removed them.


12.9.18

Mounting and cutting out counters

There are those gamers who prefer to buy their games with die cut counters and there are those gamers who don't mind mounting counters, cutting them out, and enjoying the fruits of their labor while applying band-aids.

I am one of those. I have enough scars from slicing off finger tips (true stories), cutting hands and plain just looking like one was in a tiff with Miss Loretta who did not argue, but would just tell you, "don't make me cut ya". 

I have developed my own way of mounting and cutting out counters thru out the years, and what tools I use. It may not be perfect, but it works for me. Heed the warnings: 

WARNING!!!! GO SLOW!!! Neither this blog nor myself will be held accountable for your actions or lack of ability. Know your limitations.

With the warnings out of the way, here is how I mount and cut out counters:

Background on the different tools used and why:

  • 12" steel rule
  • 18" steel rule
  • utility knife (aka "U.K.")
  • glue stick (GS) or 3M spray glue 
  • X-Acto with #11 blade (not used by me)
  • a cutting mat - 11"x17" and/or larger
  • backing for the counters: white, 24 lb (I use Ultra Pro Magazine Size Board for comics. Acid free and THIN!)
The 12" ruler has a rubber backing on it (rubberized electrical tape, I put on) to keep it from slipping. The 18" ruler has a cork backing, but I only use it when I have 11"x17" game maps to cut out, as the cork is aprx 1/32" of a stand off and sometimes the ruler will slip a little bit, not allowing a perfect cut. While the rubber backing on the 12" rule grabs, doesn't slip and is thinner.

The U.K. is used instead of a #11 X-Acto type knife blade, because, I have big hands and can hold it easier. The blades on the U.K. are not any wider than the #11 blade and to me is safer to use.  

One can use either a glue stick or 3M Adhesive spray. Though to be honest, the 3M spray requires one to be outside and goes everywhere (nothing like having arm hair stuck together). The glue stick is easier to use, especially inside a house and holds everything as well as the 3M spray. I tend to buy 10 of them at a time when they are on sale for school supplies (50 cents for a BIG stick).

And most important, a self healing cutting mat. My first mat was 11"x17" in size and perfect for smaller 8.5"x11" size projects. I recently bought a larger cutting mat as my projects are getting larger, bigger than letter size, almost 11"x17" in size.  Save yourself some money and buy a larger one. You will use it sooner or later. :)

BE CAREFUL!


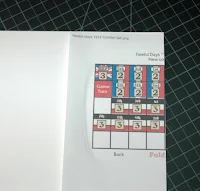
Here is the counter sheet I am going to mount. It is a set of replacement counters that I made for a WWI pocket game, called "Fateful Day 1914". It isn't very large and has both a front side and back side to it, with fold lines.  

Since the fold lines are visible, fold to crease the paper on the "fold line". 

Once the paper has been folded, coat the backside with the glue stick.(I use the purple kind to easily see where I miss spots  :)  ) then line it up and press it down, lining up the front and back correctly. In this case, if the lines are folded, it can be glued on both sides and glue from one of the edges, as this lines everything up correctly.

Here are both sides glued down. Don't mind the wrinkle as it's outside of the area needed. As long as there is no wrinkle in the counter art or project, everything is good.

Let it dry for 10 mins or so. And rub it down!!! Note: Some printing paper used will require longer drying times and possibility of being put under a weight for a few hours.  You won't know until you mount.

I am using a new protection product after mounting the counters but before cutting them out, Krylon Low Odor Clear Finish, Matte as a permanent, protective coating. This protects the counter better from wear. Why this one brand? Very low odor, and cleans up my hands and spray tip with soap and water. Easy to use. 

👉 When using a protective spray such as this product shake, rattle, and roll the can for several minutes! Important to get everything mixed.  Spray a very light coat, let dry, and then spray another one.  I usually spray 3 light coats as one doesn't want this clear coat to run and cause problems.

Don't forget to let it dry for several hours between coats and before cutting out.

👉 If you use such a product be sure and test it on your counter sheet BEFORE using on everything. As a wood worker, I have ruin a couple of finishes by using a clear spray product to protect the wood and finish without testing it out first. And be sure to let your ink dry before coating!!!


WARNING: 
Line up your ruler and make 2 or 3 light cuts. NEVER bear down heavy and try to cut thru in 1 cut. You will probably ruin your cut and possibly hurt your self. 

Remember to go slow, keep finger tips out of the way and keep the blade as straight up and down as you can.  Be Careful!

Depending on what you want to do, I carefully cut the counters in strips. Look carefully to see what is the least amount of work using scissors will be. In this case cutting in strips in either direction will be the same amount of work, i.e. scissors cutting.  You can use a U.K. or #11 knife if  you want, just easier on me to use scissors.

Using a pair of scissors, I cut the counters apart.  This is one of the reasons why I use the comic backing board. The counters are thick enough for me and easy to cut out. 

And for the grand finale, clip the counters to round the edges for a more posh look. 

You can see what I use here for rounding the corners. Several sizes are available, I just found that the 2.5mm rounded counter is the best for me as it is good for 1/2" and up to 1" counters.

👉 Take your time, measure twice, cut lightly several times, and above all, be careful.

Yes, lots of warnings, just be careful.  Don't be in a rush.  
 
And you too can make your own mounted counters. I like using the comic backing board as it is sturdy enough and thin enough to cut thru with scissors. 
 
Also, make sure you make a copy of those counters you are going to be mounting (BEFORE CUTTING) and use that. That way you still have the original counters in case you lose one. And, yes, this is legal.  One can always make a copy for personal use. Just don't copy and give away or sell, that is verboten.

Enjoy and let me know how your mounting project came out!
-ab


This blog is considered to be a living blog. Changes will be made to it as needed to clarify, correct errors or update with new information. And I apologize, but this review may contain references to graphics that are no longer on this blog. Long story, but it was Google who removed them.